Book Tickets
This page walks you through booking tickets for a Buzz event end to end — from opening the registration page to receiving your ticket by email. It is the canonical booking flow; guest (no-account) booking with OTP is covered in Guest Booking, and gateway/offline configuration in Payment Gateways & Offline.
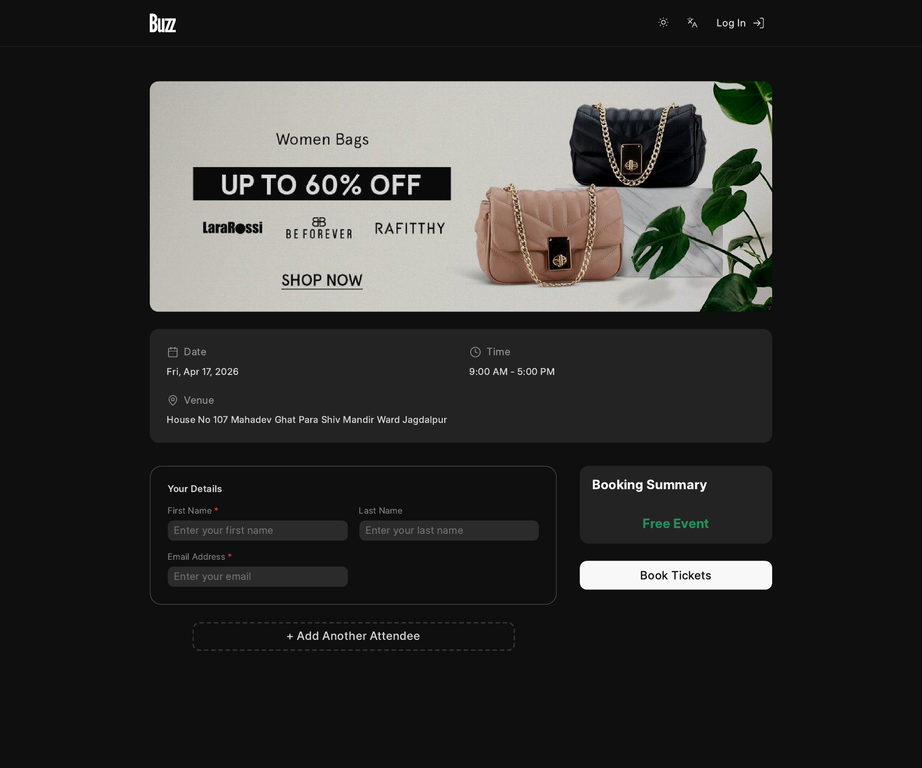
The registration page lives at:
/b/:eventRoute/register
where :eventRoute is the event's slug (for example /b/frappe-conf-2026/register).
Before you start
- The event must be published. An unpublished or missing event shows an "Event Not Found" screen.
- Registrations must be open. If the event's registration close time has passed, you see a "Registrations Closed" screen instead of the form.
- You can fill the form as a guest, but login is required at checkout for paid bookings unless the organizer has enabled guest booking for the event.
Step-by-step
1. Open the registration page
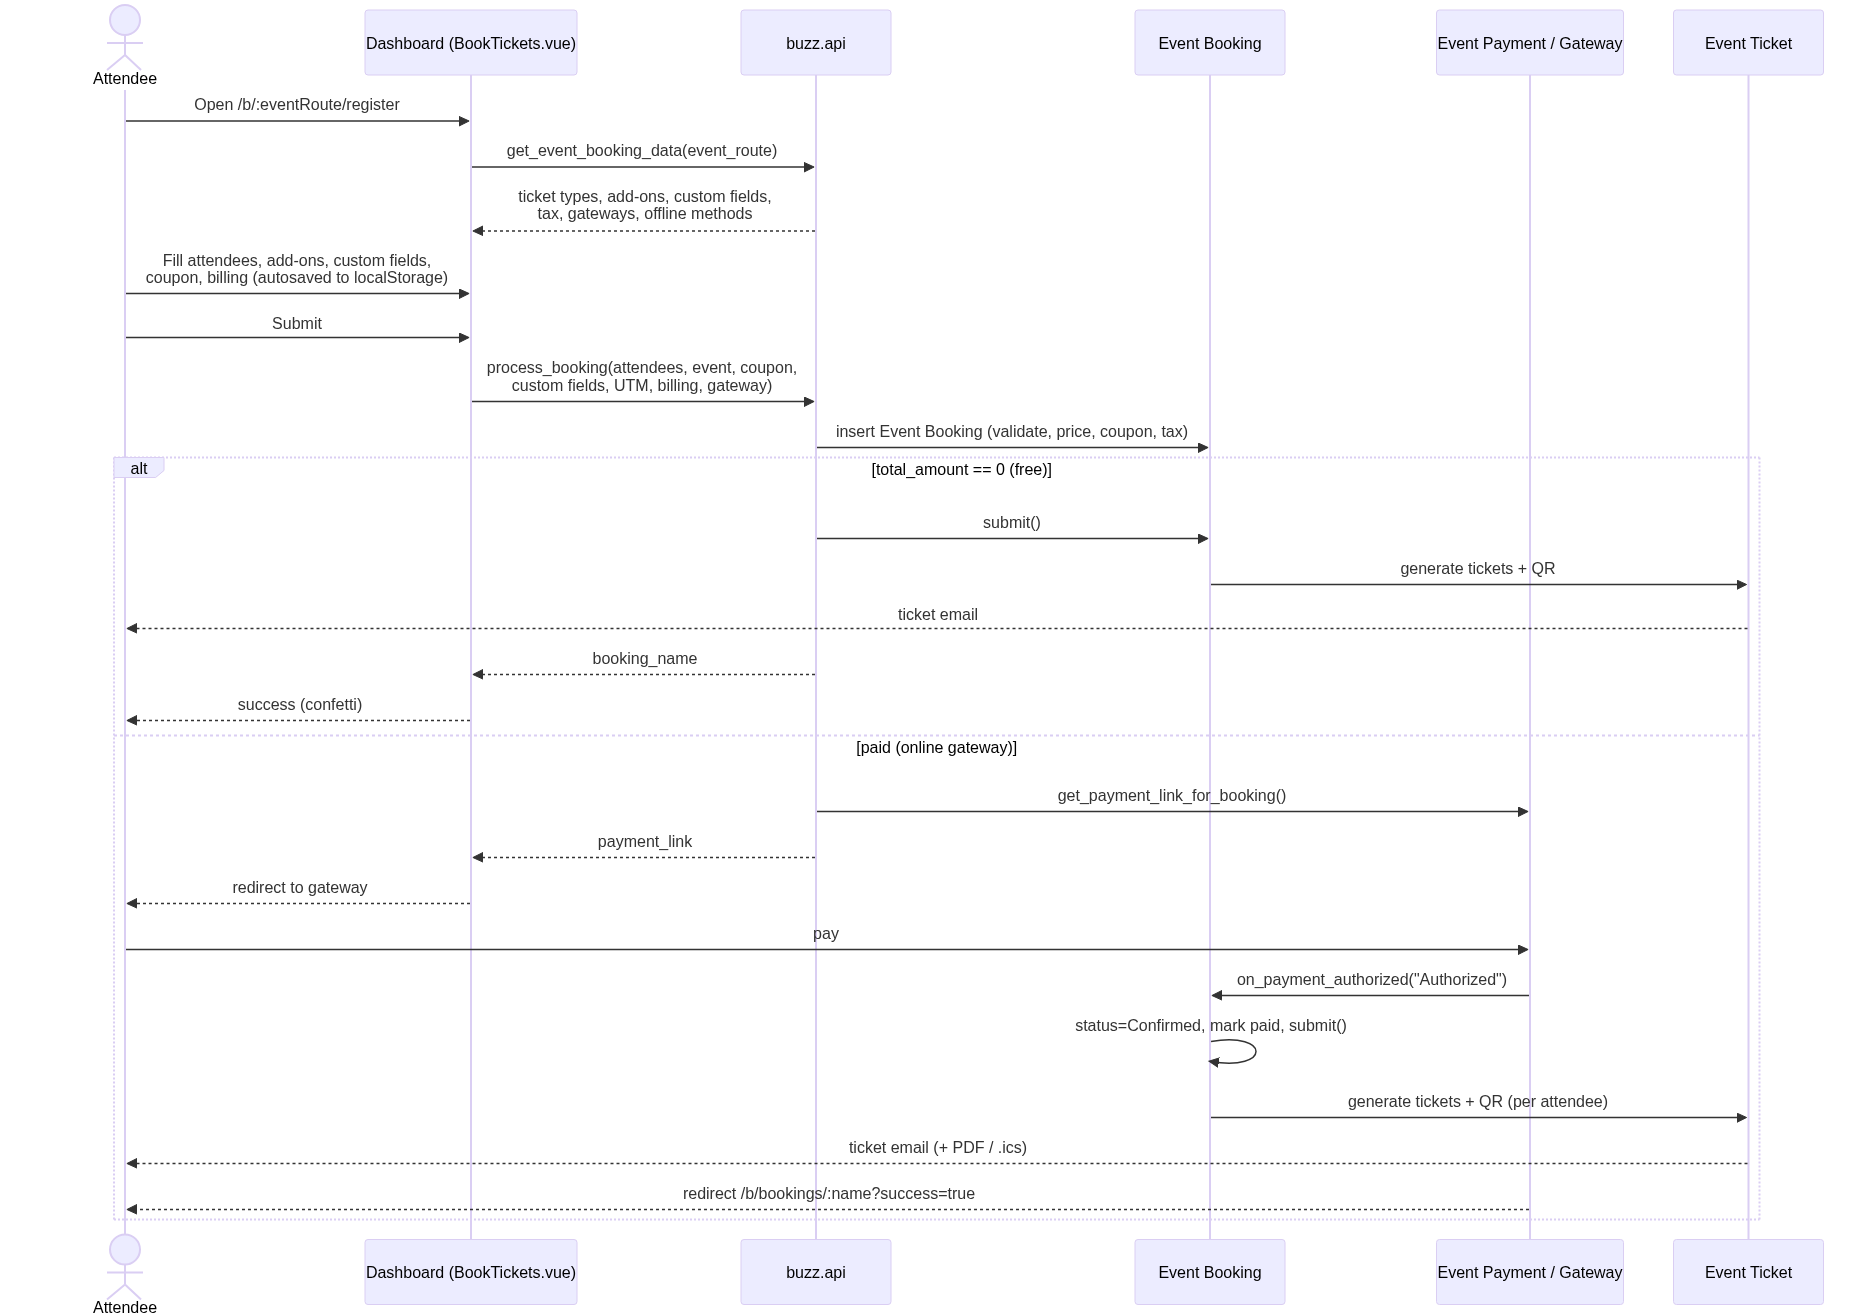
Go to /b/:eventRoute/register. The page calls get_event_booking_data and
loads everything the form needs: the published, in-stock ticket types,
enabled add-ons, custom fields, tax settings, the configured payment gateways,
and any offline payment methods. Only ticket types that are published and
still have inventory are offered.
2. Add attendees and pick ticket types
Add one row per attendee. For each attendee choose a ticket type and enter their first name, last name, and email. For webinar-category events, a last name is required for every attendee.
Your progress is autosaved to your browser (localStorage), scoped to the event route. If you close the tab and return to the same registration page, your attendees, add-on selections, custom-field answers, and (for guests) contact details are restored. The draft is cleared automatically once the booking succeeds.
3. Choose add-ons
If the event has add-ons enabled, each attendee can select them. Some add-ons are a simple yes/no; others ask you to pick an option from a list. Add-on prices are added to that attendee's subtotal.
4. Fill custom fields
The organizer may define event-specific custom fields. These appear in the form as booking-level fields (asked once for the whole booking) or per-attendee fields. Mandatory fields must be filled before you can submit. Phone-type fields are validated against their country code.
5. Apply a coupon (optional)
Enter a coupon code and apply it. The form calls validate_coupon, which checks
that the code is valid for this event, still has usage left, and hasn't hit your
personal usage limit. Two coupon kinds are supported:
- Discount — a percentage or fixed amount off, subject to any minimum order value and maximum discount cap.
- Free Tickets — covers eligible attendees of a specific ticket type (and any configured free add-ons), up to the number of free tickets remaining.
You can apply a coupon without logging in; login is only enforced when you proceed to pay.
6. Add billing details (optional)
If the event applies tax, you can request an invoice. When you do, enter your tax ID and billing address; these are stored on the booking. Tax is shown in the summary as either inclusive (already in the price) or added on top, according to the event's tax settings.
7. Review the summary and submit
The booking summary shows per-attendee amounts, add-on totals, any discount, tax,
and the final total. When you submit, the form calls process_booking. UTM
parameters present in the page URL (utm_source, utm_campaign, etc.) are
captured and stored on the booking for attribution.
What happens next depends on the total:
- Free booking (total = 0): the booking is submitted immediately, tickets are
generated, and you are taken to the booking confirmation
(
/b/bookings/:bookingName?success=true). No payment step. - Paid booking, online gateway: if more than one gateway is configured you pick one; you are then redirected to the gateway's hosted payment page.
- Paid booking, offline method: you submit payment proof; the booking is created as Approval Pending / Verification Pending for an organizer to verify.
8. Pay
On the gateway page, complete payment. The gateway redirects you back to
/b/bookings/:bookingName?success=true. On return, the booking page shows a
success state with celebration confetti and your tickets.
What happens on payment authorization
You don't have to do anything after paying — the rest is automatic. When the
gateway confirms payment, Buzz runs on_payment_authorized on the booking:
- The booking's payment status is set to Paid and status to Confirmed.
- The payment record is marked received and the booking is submitted.
- On submit, the coupon (if any) is re-validated with a row lock to prevent over-allocation, then one Event Ticket is generated per attendee.
- For each ticket, a QR code is generated and the ticket is submitted.
- If the event has ticket emails enabled, the attendee is emailed their
ticket — optionally with the ticket print format attached as a PDF and a
calendar (
.ics) invite. - For webinar events with Zoom integration, a Zoom webinar registration is created for each ticket.
The QR code on each ticket is what check-in staff scan at the door.
Booking flow diagram
Troubleshooting
- "Event Not Found" — the event isn't published, or the route slug is wrong.
- "Registrations Closed" — the event's registration close time has passed.
- "Only N tickets available…" — inventory for that ticket type ran out between loading the form and submitting; reduce the quantity and retry.
- Didn't get the ticket email — ticket emails are only sent if the organizer enabled them for the event; check spam, and confirm the attendee email is correct.
- Paid but no tickets — tickets are generated only after the gateway confirms payment. If the gateway didn't redirect back, the booking may still be Approval Pending; contact the organizer.