Create an Event
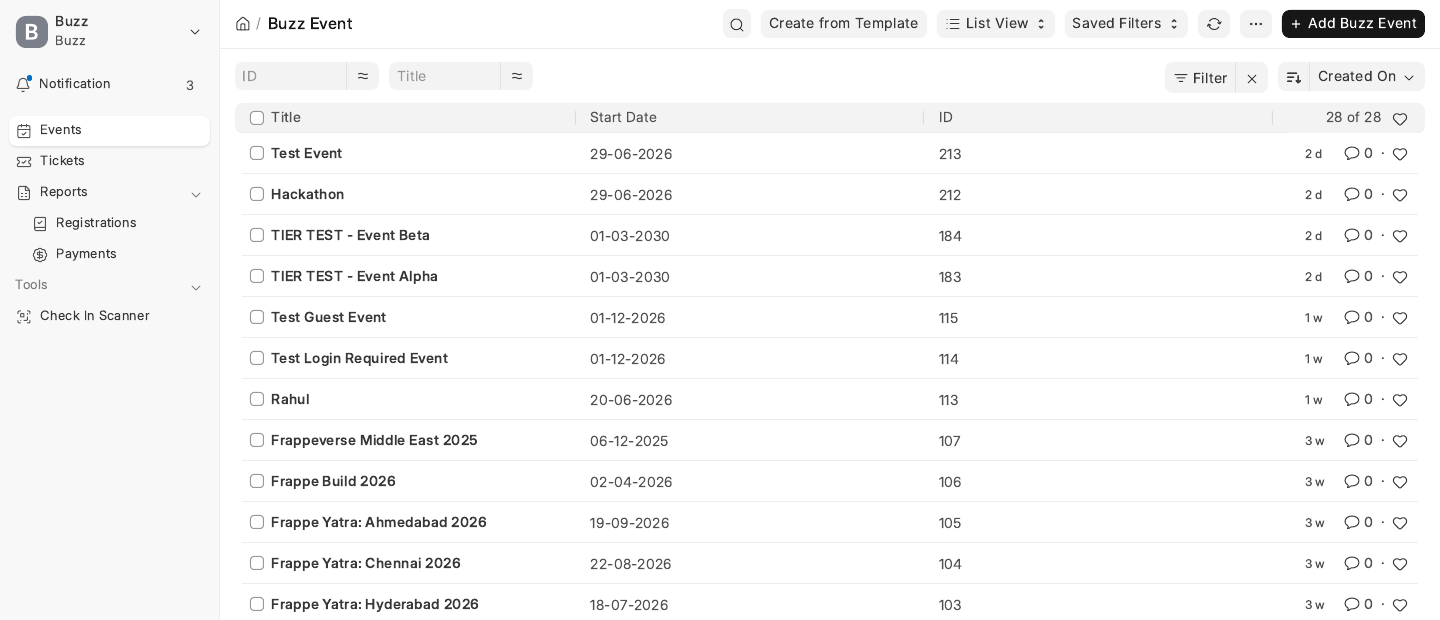
An event is the centre of everything in Buzz. Tickets, sponsorships, talks, the schedule, custom forms, check-in and reports all hang off a single Buzz Event record. This page walks you through creating one in Desk, configuring its ticketing, payment and sponsorship settings, and publishing it so attendees can register.
You need the Event Manager (or System Manager) role to create events.
Before you start
A few records must exist first, because they are mandatory on the event form:
- Event Category (e.g. "Conferences", "Webinars") — required.
- Event Host — the organising entity — required.
- Event Venue — required only when the event Medium is In Person.
See Venue, Category & Host to create these.
Create the event
- Go to Buzz Event > New (
/app/buzz-event/new), or click + New from the Buzz Event list. - Fill in the Details tab:
- Title — the public name of the event.
- Category — select an Event Category.
- Medium — In Person (default) or Online. When set to In Person the Venue field becomes required.
- Host — select an Event Host.
- Banner Image — optional cover image shown on the event page.
- Set the date and time:
- Start Date and Start Time are required.
- End Date is optional — leave blank for a single-day event.
- End Time is required.
- Time Zone — used for display and (if enabled) Zoom.
- Add a Short Description and the longer About rich-text description.
- Save (
Ctrl/Cmd + S).
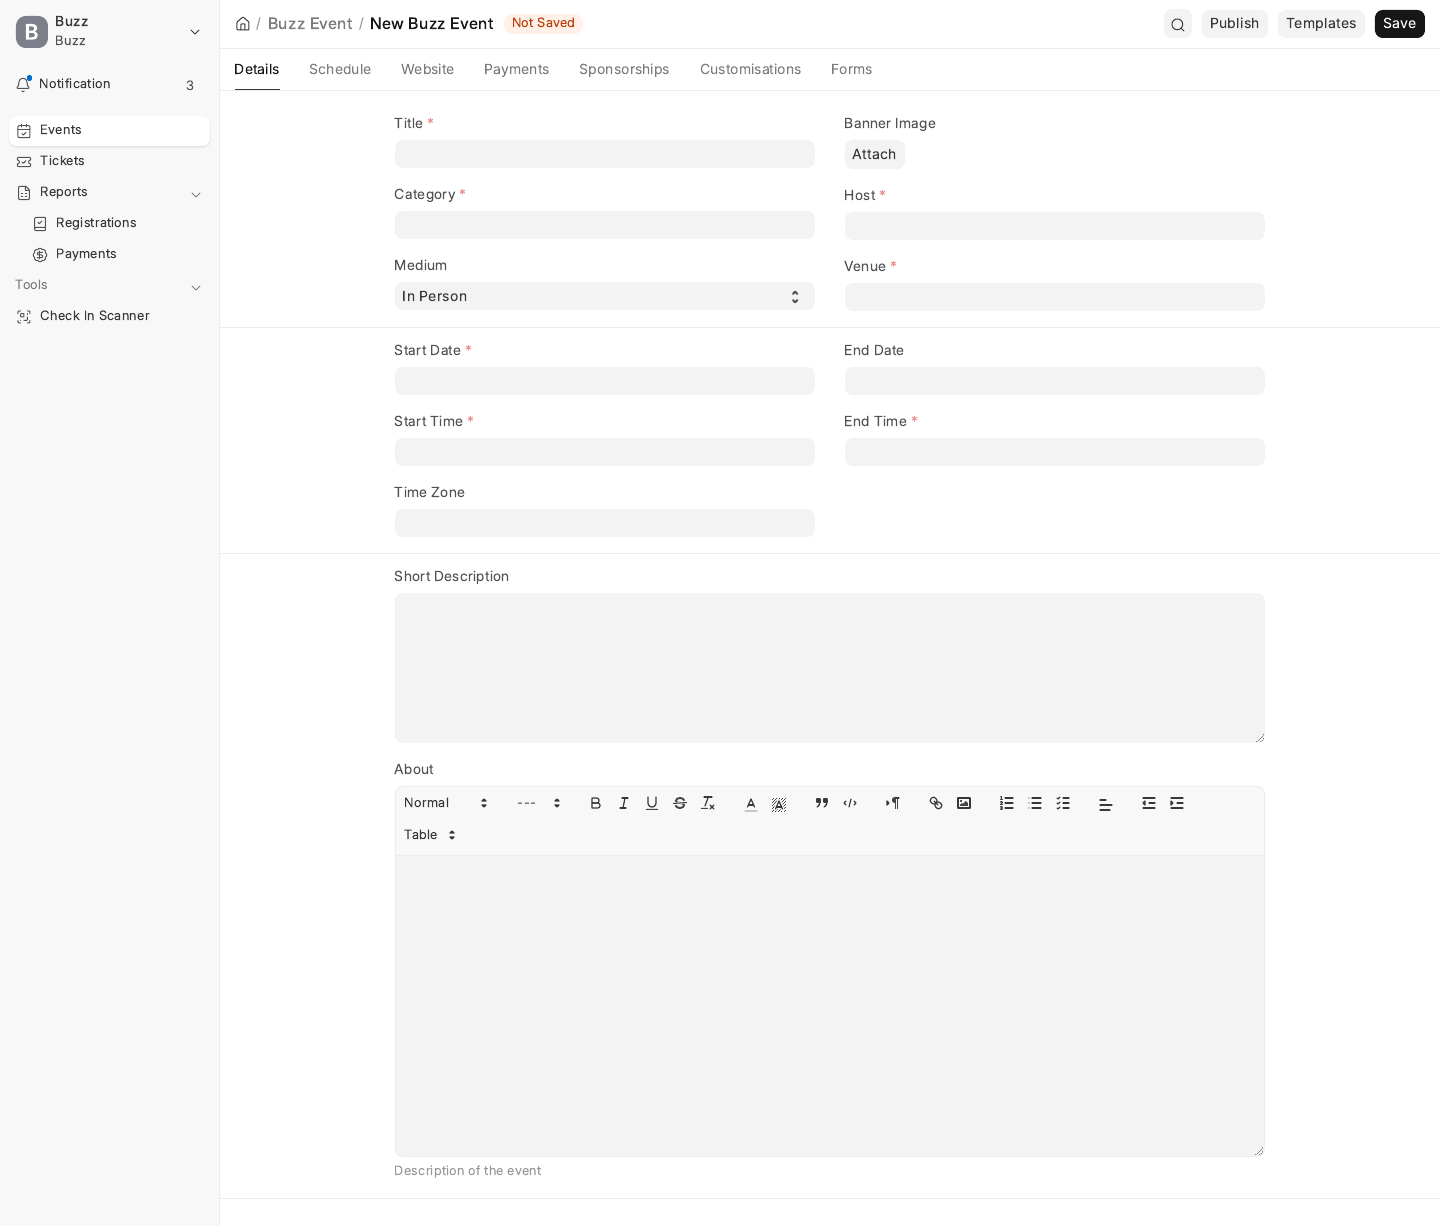
The form is organised into tabs: Details, Schedule, Website, Payments, Sponsorships, Customisations, Forms and Connections. The sections below cover the ones you set up most often.
Date and time validation
Buzz blocks impossible dates when you save:
- End Date cannot be before Start Date.
- For a single-day event (no End Date, or End Date equal to Start Date), End Time must be after Start Time.
- Every Schedule row must fall within the event's dates, have an end time after its start time, and stay inside the event's start/end times.
Publish and the route (slug)
Events are unpublished by default. The Website tab holds the publish controls.
- Open the Website tab.
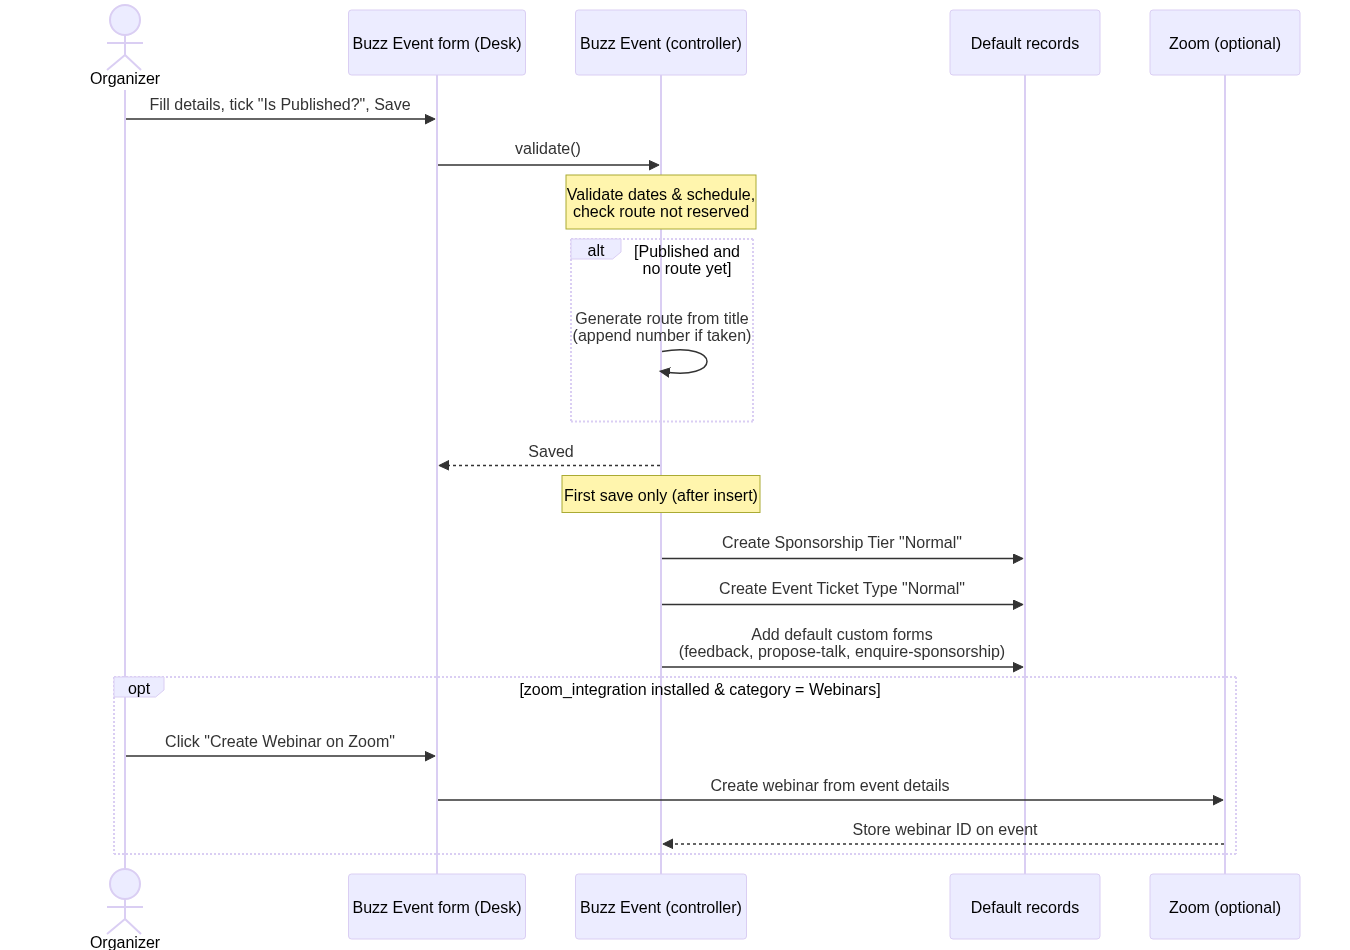
- Tick Is Published? — or use the Publish / Unpublish button in the form toolbar, which toggles the flag and saves in one click.
- Save.
When you publish an event that has no Route yet, Buzz auto-generates one from
the title (for example PyConf India 2026 becomes pyconf-india-2026). If that
slug is already taken by another event, a number is appended to keep it unique.
You can edit the Route field manually, but a handful of slugs are reserved for
dashboard pages and will be rejected: account, bookings, tickets,
register-interest, check-in, book-tickets, event-proposal, events.
Once a published event has a route, the form toolbar shows web links to the public event page and the registration page. The dashboard registration page lives at:
/b/<route>/register
For example /b/pyconf-india-2026/register. The /b prefix is the Buzz
dashboard base route.
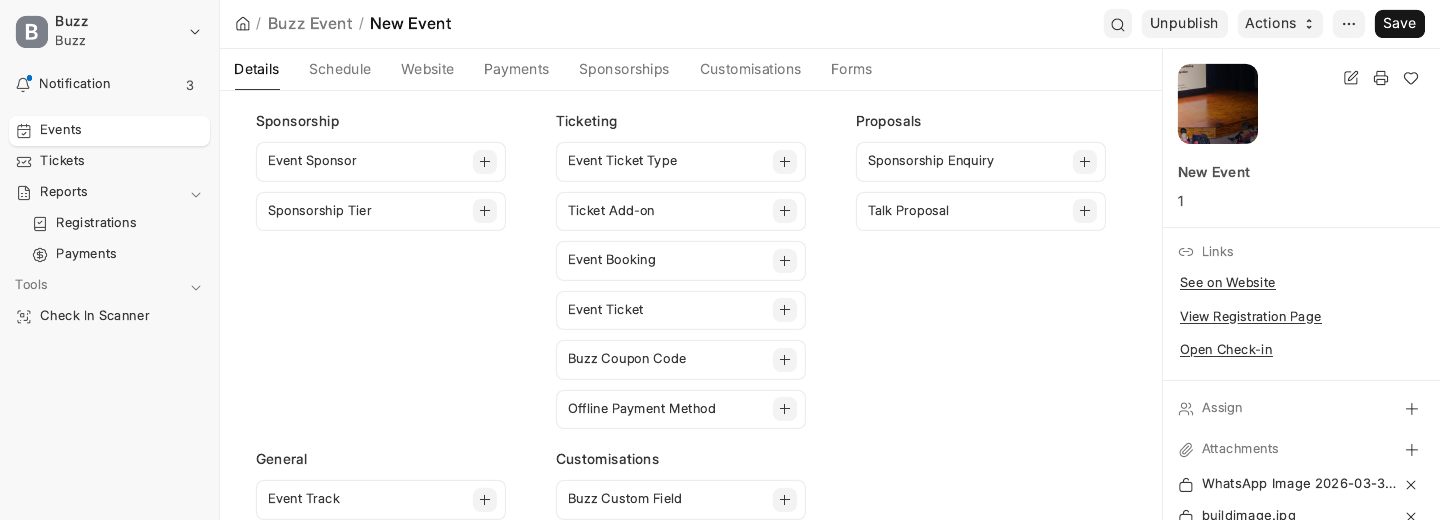
What Buzz creates automatically
The first time you save a new event (on insert), Buzz seeds it so it is usable straight away. It creates:
- A default Sponsorship Tier named Normal, linked to the event.
- A default Event Ticket Type named Normal, linked to the event.
- Three default Custom Forms on the Forms tab, ready to share:
- Event Feedback at route
feedback - Talk Proposal at route
propose-talk - Sponsorship Enquiry at route
enquire-sponsorship
- Event Feedback at route
You will normally rename and re-price the Normal ticket type and add more tiers and types — these are just starting points so the booking and sponsorship flows work immediately. See Ticket Types & Inventory and Sponsorship Tiers & Decks.
Ticketing and payment settings
Payments tab
- Payment Gateways — add one row per gateway you want to offer for this event. See Payment Gateways & Offline Payments.
- Tax Settings:
- Apply Tax on Bookings? — when ticked, tax is added to bookings. Enabling
it defaults the Tax Label to
GSTand Tax Percentage to18if you leave them blank. - Tax Inclusive — when ticked, ticket prices are treated as tax-inclusive and the tax is back-calculated from the price instead of added on top.
- Tax Label and Tax Percentage become required once Apply Tax is on.
- Apply Tax on Bookings? — when ticked, tax is added to bookings. Enabling
it defaults the Tax Label to
Customisations tab (ticket emails)
- Send Ticket Email — email tickets to attendees after booking (on by
default). The options below it appear only when this is on:
- Attach Email Ticket and Ticket Print Format — attach a printable ticket using the chosen print format.
- Attach Calendar Invite — include a calendar (.ics) invite.
- Ticket Email Template — the email template to send.
Website tab (booking defaults)
- Default Ticket Type — pre-selected in the booking form. Only published ticket types of this event are selectable.
- External Registration Page? — when ticked, registration is handled by an external URL (Registration URL becomes required) instead of the Buzz booking flow.
Sponsorship settings
On the Sponsorships tab:
- Show Sponsorship Section on Website — show or hide the sponsorship section on the public event page.
- Auto Send Pitch Deck? — when ticked, the pitch deck is emailed
automatically on a new sponsorship enquiry. The fields below configure that
email and appear only when it is on:
- Email Template (a default is used if blank)
- Reply To and CC
- Attachments — the deck files to send.
Optional: Zoom webinar
If the optional zoom_integration app is installed and the event's
Category is Webinars, the form shows Zoom actions:
- Create Webinar on Zoom — creates a Zoom webinar from the event's title, start date/time, duration (computed from start and end time), time zone and the default webinar template from Buzz Settings. The new webinar's ID is stored on the event. An End Time is required before you can create the webinar.
- After creation, the button is replaced by View Webinar on Zoom.
Once an event is linked to a Zoom webinar, editing the Start Date, Start
Time, End Time or Time Zone and saving will push those changes to the
Zoom webinar automatically. If zoom_integration is not installed, none of this
appears and the rest of the event works normally.
What happens when you create and publish an event
Next steps
- Venue, Category & Host
- Speakers & Schedule
- Ticket Types & Inventory
- Event Templates — spin up a pre-configured event from a saved template