Check-in Scanner
Use the check-in scanner at the event door to validate attendee tickets and record their arrival. You select the event, scan each ticket's QR code (or type the ticket ID by hand), and Buzz confirms whether the ticket is valid before you check the attendee in.
Who can use it
The scanner is restricted to staff with the Frontdesk Manager role. If you open the scanner without that role, you see an Access Denied message and cannot scan anything. Ask an admin to assign you the Frontdesk Manager role (see Admin → Roles & Permissions) before your shift.
The role is enforced on the server too, so even a direct API call from an unauthorized account is rejected — not just hidden in the UI.
Open the scanner
Go to /b/check-in.
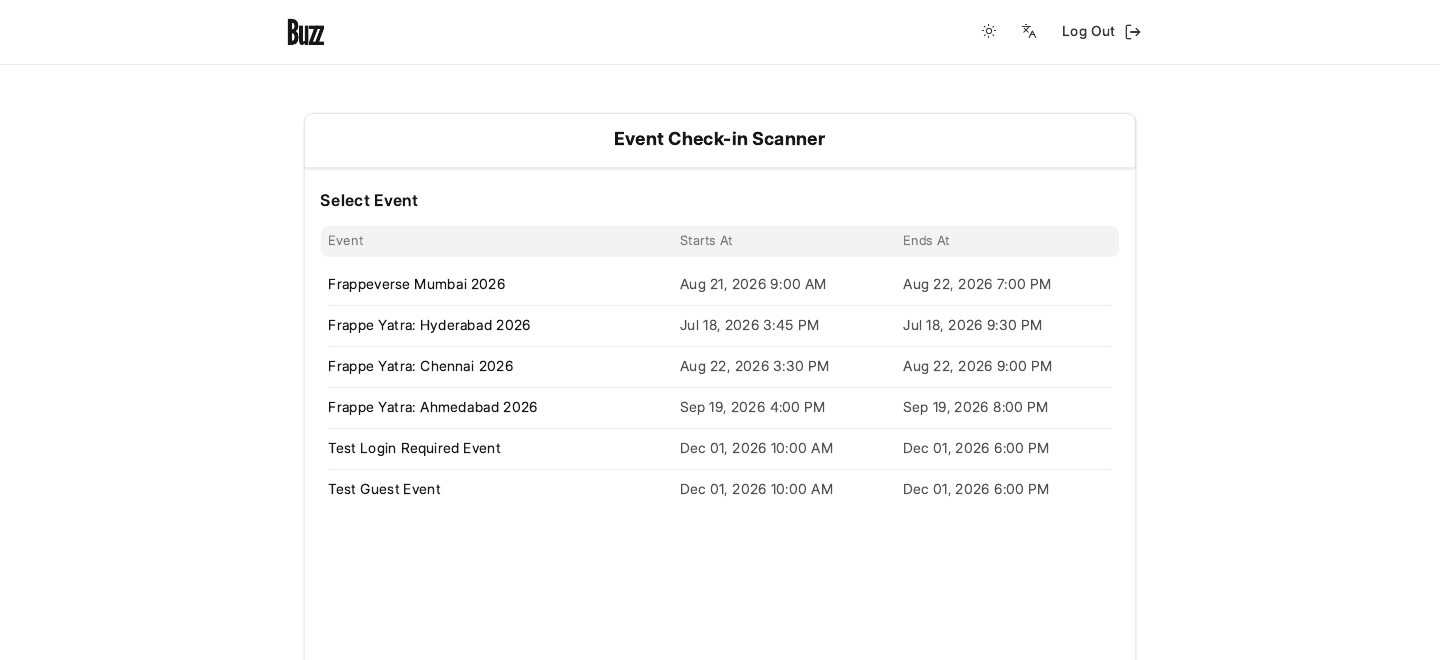
Step 1 — Select the event
When you arrive, the scanner shows a list of events you can check people in to. The list only contains events that are published and whose end date is today or later, so past and unpublished events are filtered out automatically.
- Find your event in the list (sorted by start date, newest first).
- Click the event row to select it.
Once selected, the scanner opens for that event and the URL updates to
/b/check-in/<event-name> so you can refresh or bookmark the page and stay on the same
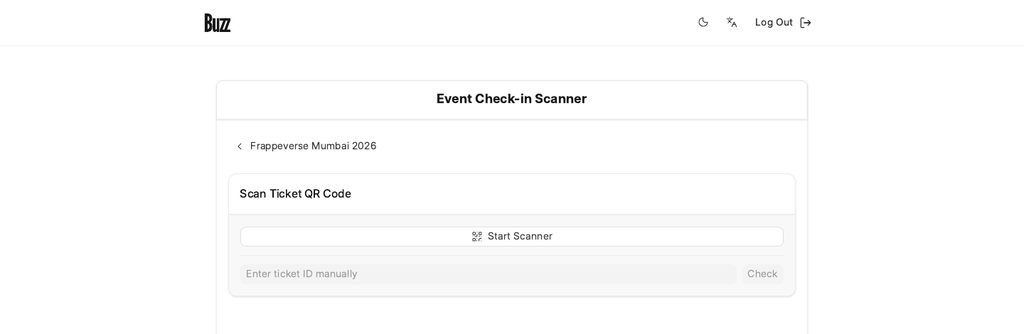
event. Use the back button (showing the event title) to return to the event list.
Step 2 — Scan a ticket
The camera scanner starts automatically when the page loads.
- Point the back camera at the attendee's ticket QR code.
- Hold steady inside the scan box until it reads the code.
You can also use the on-screen Start Scanner / Stop Scanner buttons to control the camera. If the camera fails to start, check that you granted the browser camera permission.
The scanner ignores a repeat of the same ticket within two seconds, so an accidental double-read won't fire twice.
No camera? Enter the ticket ID manually
Below the camera there is a manual-entry field. Type the ticket ID and click Check. This runs the exact same validation as a scan — useful when a phone screen is too dim to scan or the printed QR is damaged.
Step 3 — Read the result and check in
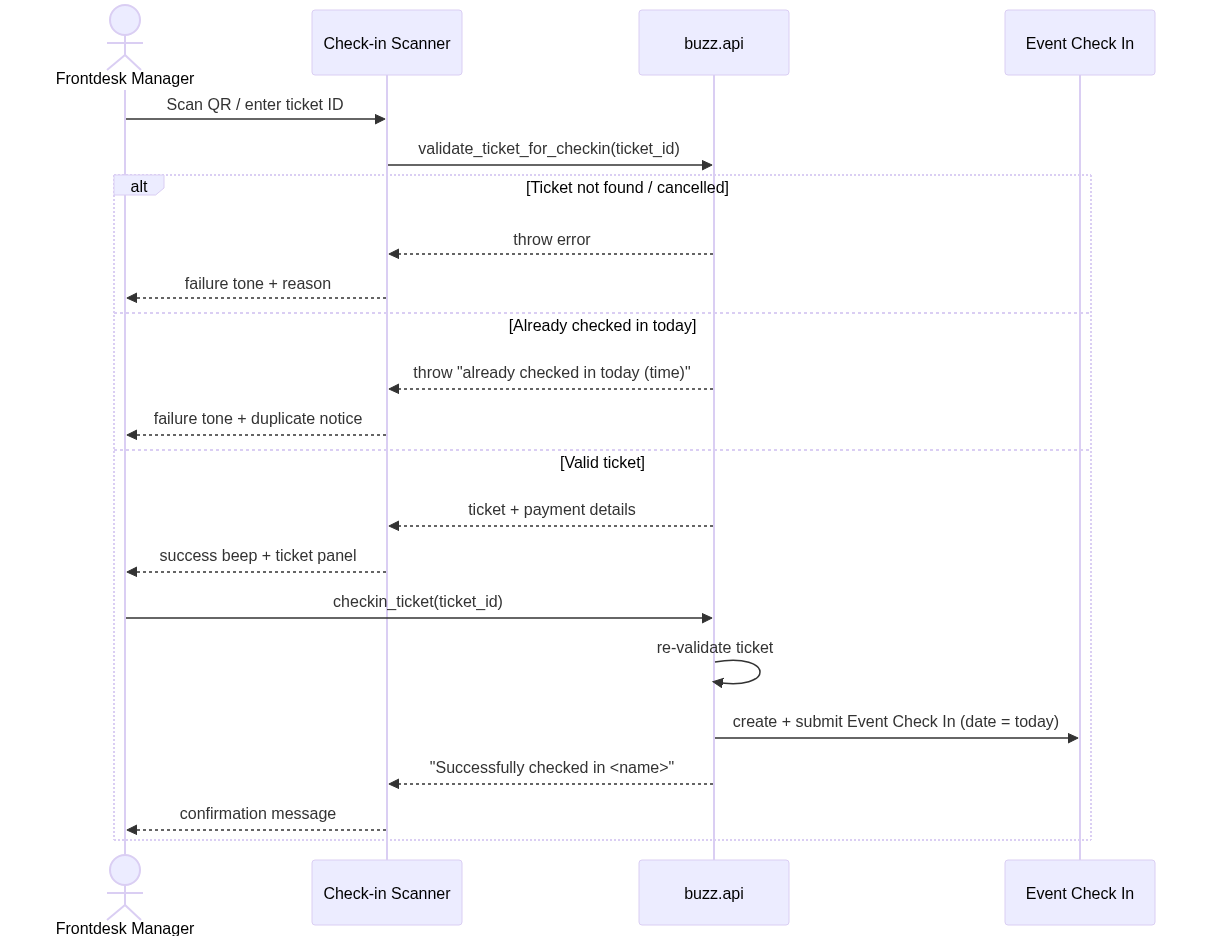
Every scan validates the ticket on the server before anything is recorded. A short beep means the ticket is valid; a failure tone means it was rejected. The result also shows on screen.
When a ticket is valid, a ticket details panel appears showing the attendee name,
ticket type, add-ons, and payment details. Confirm the check-in from that panel — Buzz
records an Event Check In for today's date and shows a success message like
"Successfully checked in
What counts as valid vs rejected
A scan is rejected (failure tone, no check-in recorded) in these cases:
- Ticket not found — the scanned ID doesn't match any ticket for this site.
- Ticket cancelled — the ticket was cancelled and can't be used for entry.
- Already checked in today — a check-in already exists for this ticket on today's date. The message includes the time of the earlier check-in. (Check-ins are scoped per day, so a multi-day event lets the same ticket check in again on a later day.)
Otherwise the ticket is valid and ready to check in.
Recording the check-in re-runs the same validation, so a ticket that was checked in by another staffer a moment earlier will still be caught as a duplicate at confirm time.
Flow
Tips
- Keep the scanner on one event per device; selecting an event clears the previous scan result so counts don't bleed across events.
- For multi-day events, the same ticket can be scanned again each day — a duplicate is only flagged for the current day.
- Use manual entry as a fallback whenever a QR won't scan; it validates identically.