Organize Your Catalog (Categories)
Categories are the top‑level menu shoppers use to browse your store — the Men, Women, Clothing, Bags… links across the top of every storefront page, each opening a tidy product listing. This section shows you how to create those categories, put them in the order you want, and confirm they appear on the live storefront.
In iVendNext, each storefront category is a small record called an Ecommerce Category. You create one record per top‑level menu item, and each record points at a matching product group (in ERPNext this is called an Item Group) so the store knows which products belong under it.
Where it lives: Open the Desk search bar (press Ctrl/Cmd + G), type Ecommerce Category, and pick it from the list. There is no app menu — the search bar is how you reach every settings screen (see 01 · Welcome & First Login).
Before you start (prerequisites)
- 04 · Choose & Activate Your Theme — a storefront theme must be active, or there is no top navigation to show your categories in.
- 03 · Your eCommerce Settings Hub — you should be comfortable opening a settings page and clicking the blue Save button.
- Product groups exist. Each category points at a product group (Item Group). The demo store already has groups like Clothing, Men, and Women. If yours are empty, you or your administrator create product groups in ERPNext first (see the callout at the end).
You do not need any products in place to build your categories — you'll add those in 08 · Add Your First Products. Empty categories are fine for now; they'll fill up automatically as you publish products into their groups.
How categories connect to your storefront
It helps to picture the chain from your admin settings to what a shopper sees. Each Ecommerce Category becomes one top‑level menu link. Its drop‑down sub‑items come from the product groups nested underneath, and clicking any of them opens a filtered product listing.
flowchart LR
    EC["Ecommerce Category<br/>(e.g. Clothing)"] -->|points at| IG["Product group<br/>Item Group: Clothing"]
    IG -->|has sub-groups<br/>marked Display on Website| SUB["Sub-menu items<br/>New Arrival · Sale"]
    EC --> NAV["Top menu link<br/>on every page"]
    SUB --> NAV
    NAV -->|shopper clicks| LIST["Category listing page<br/>/en/products?category=Clothing"]
    IG -->|products in this group| LIST
The rest of this section walks the chain top to bottom: create the category record, order it, then check the live menu and listing.
Step 1 · Open the Ecommerce Category list
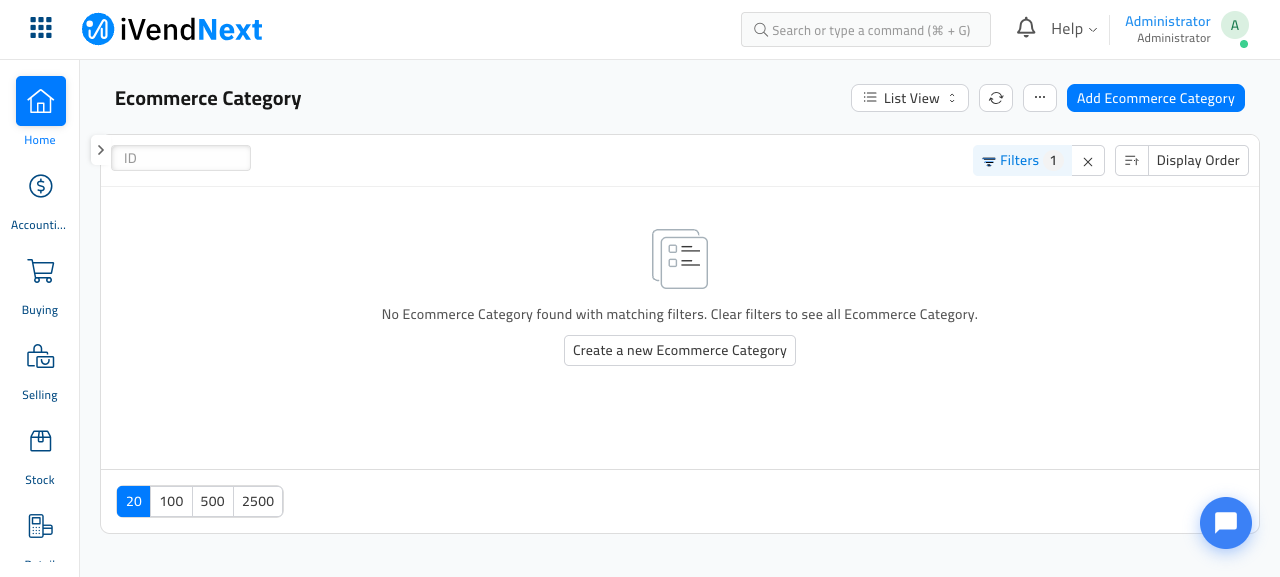
Press Ctrl/Cmd + G, type Ecommerce Category, and open it. On a brand‑new store this list is empty — you'll see a placeholder and a Create a new Ecommerce Category button.
Once you've added some, the same screen lists every category with its Status (Enabled or not) and Category Name:
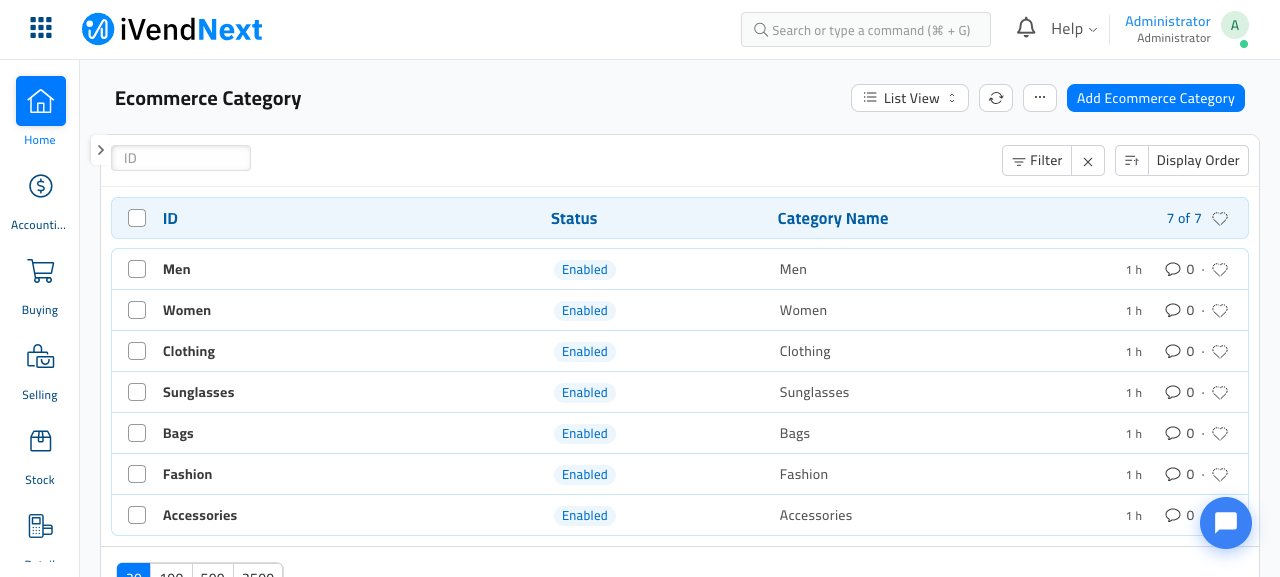
How you know it worked: you can see the list screen titled Ecommerce Category, with either the empty‑state button or your existing categories.
Step 2 · Create a category
Click Add Ecommerce Category (top right) or the Create a new Ecommerce Category button. Fill in the record:
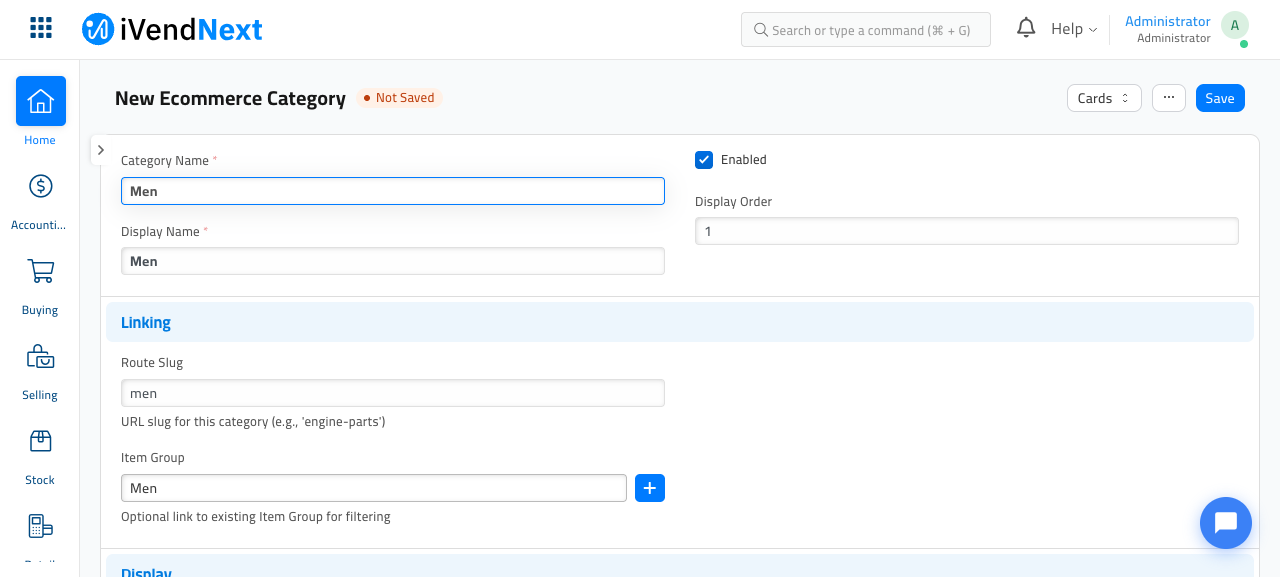
- Category Name — the internal name/ID for this category, e.g. Clothing. (This is set when you first save and becomes the record's title.)
- Display Name — the label shoppers actually see in the menu, e.g. Clothing. This can differ from the internal name.
- Enabled — tick this to show the category on the storefront. Untick it to hide the category without deleting it.
- Display Order — a number that sets left‑to‑right order in the top menu (1 shows first, then 2, 3…).
Then open the Linking section:
- Route Slug — the category's SEO page slug: a short, lowercase identifier (letters and hyphens only, no spaces), e.g.
clothing. It only helps search engines match this category (see 14 · SEO & Social Sharing); it does not set the storefront menu link, which is generated from the category name. You can leave it at its default. - Item Group — pick the product group whose products should appear under this category, e.g. Clothing. If you leave this blank, the store uses a group with the same name as the category.
The Display section below (Icon and Image) is optional. Add an Image if your theme shows picture‑style category cards; otherwise you can leave it empty. The Search Engine Listing section is covered later in 14 · SEO & Social Sharing — you can safely ignore it for now.
Click Save (or Ctrl/Cmd + S).
How you know it worked: the record title switches to your category name, a green Enabled dot appears next to the title, and a Saved message flashes at the top.
Step 3 · Add the rest and set their order
Repeat Step 2 for each top‑level menu item you want — for example Men, Women, Clothing, Bags, Accessories. Give each a Display Order number in the sequence you want them to read across the menu.
How you know it worked: back on the Ecommerce Category list (Step 1), every category you want is present and marked Enabled. The order number decides the menu order, so category 1 appears leftmost.
Step 4 · Check the live category menu
Open your storefront home page at /en/ (see 01 · Welcome & First Login for admin vs storefront) and look at the strip of links across the top.
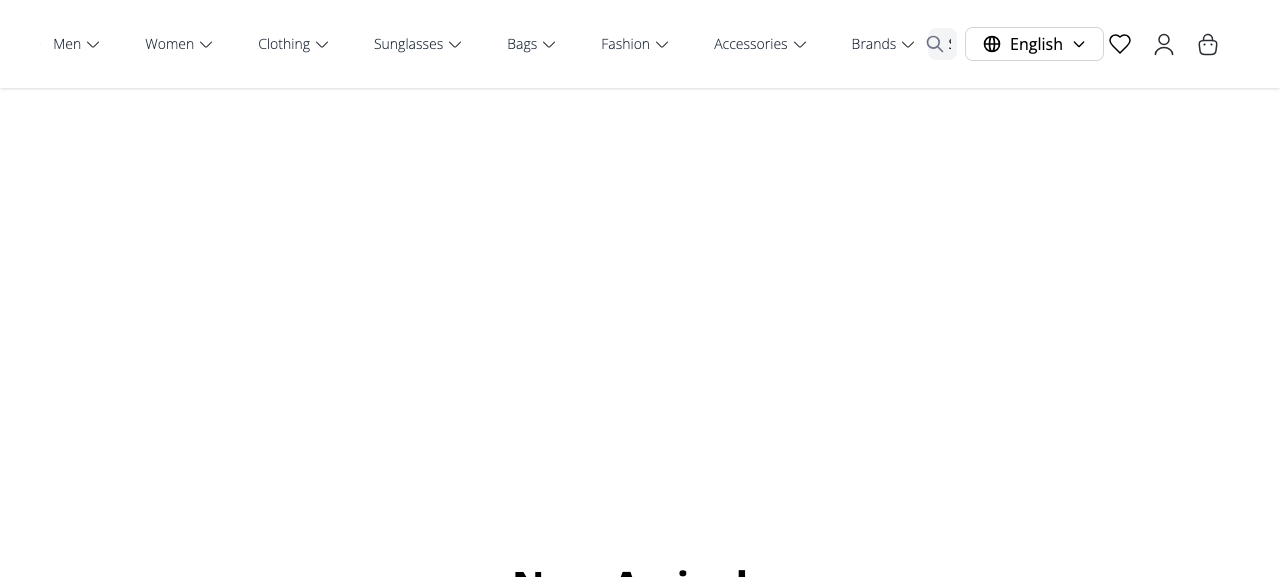
Each Enabled category appears as a menu link, left to right in your Display Order. Confirm that:
- Every category you enabled is there, using its Display Name.
- They read in the order you set.
- Any category you unticked is absent.
If a category is missing, reopen its record and check that Enabled is ticked and you clicked Save.
Step 5 · Understand the drop‑down sub‑menus
Hover a category with sub‑groups and a drop‑down appears with its sub‑categories, for example New Arrival, Sale, and a View all link.
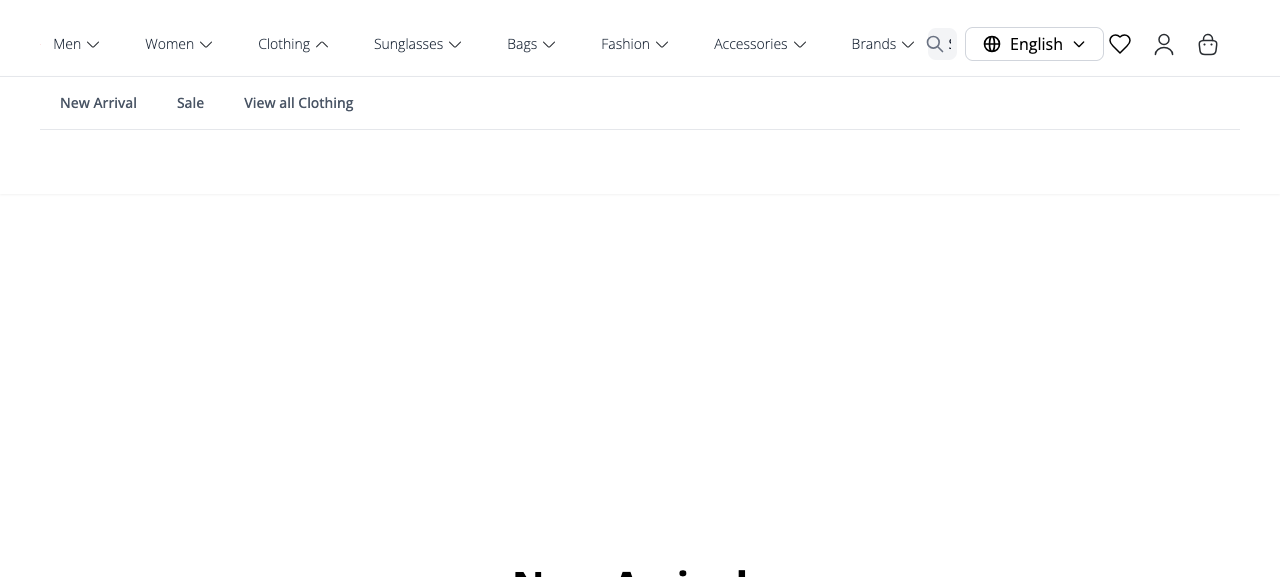
These sub‑menu items are not separate Ecommerce Category records. They come from the sub‑groups nested under this category's product group — the ones an administrator has marked Display on Website (see the technical callout at the end). So the top‑level menu is yours to control here, and the sub‑menu follows your product‑group structure automatically.
How you know it worked: hovering the category reveals its sub‑items, and a View all … link is always present.
Step 6 · Check the category listing page
Click a category (or a View all link). The store opens that category's product listing — a heading with the product count, a Filter By sidebar (product group, brands, sizes, colours, price), and the product grid.
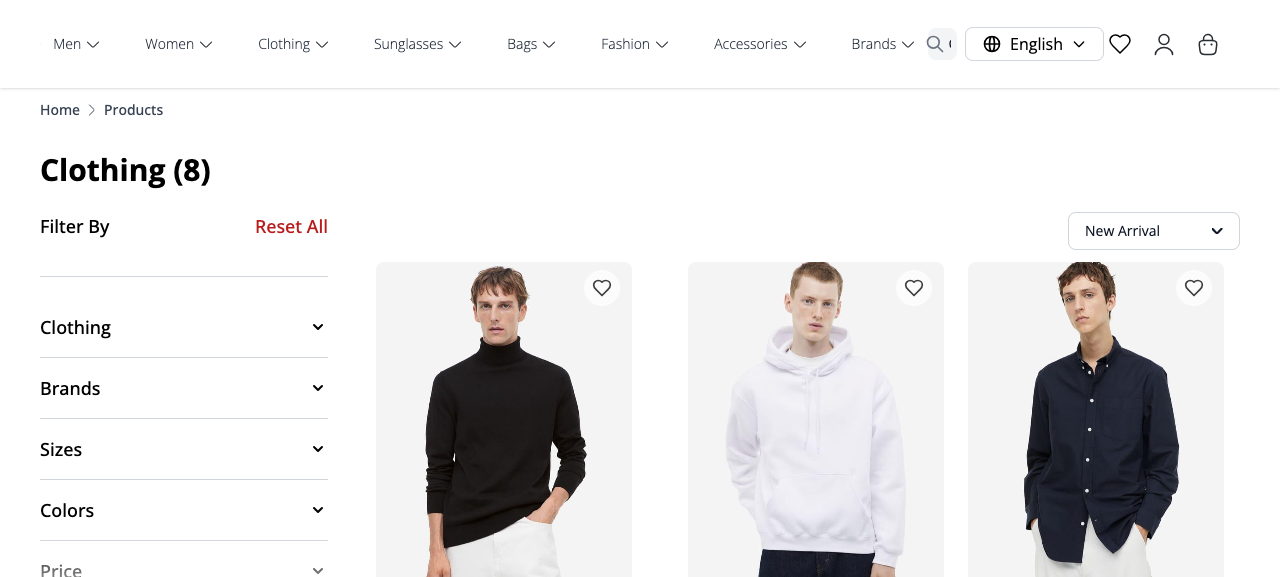
How you know it worked: the page title shows your category name and the number of published products in it, and the grid shows those products. A brand‑new category will read (0) until you publish products into its group — that's expected, and 08 · Add Your First Products fills it.
Bulk‑mapping products into new categories
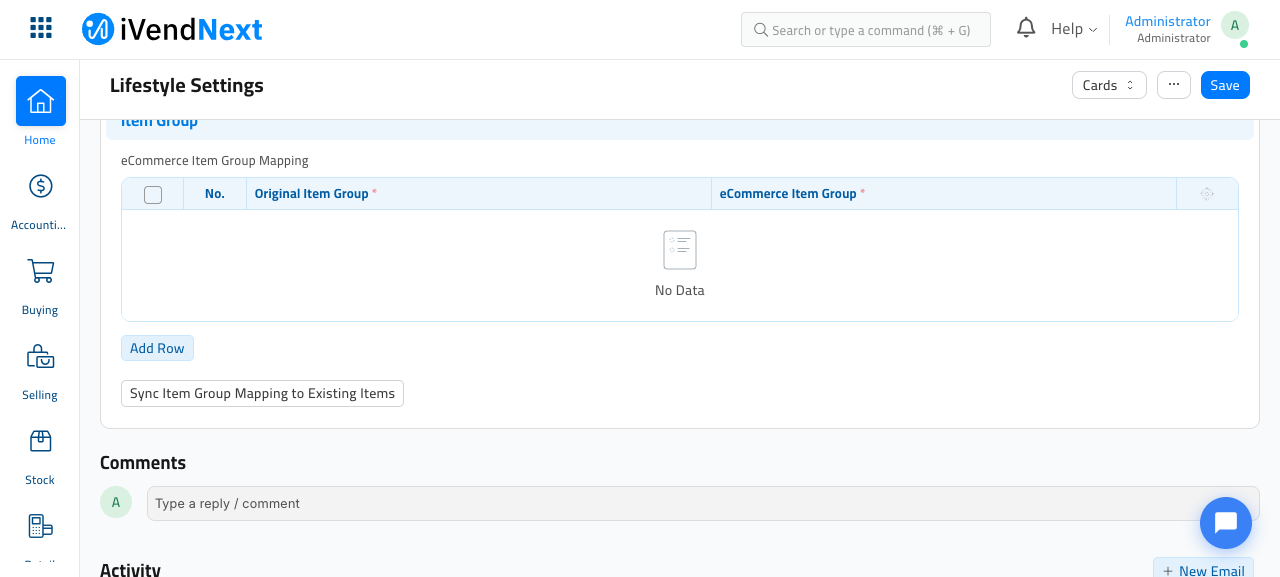
If you already have lots of products filed under old or different product groups and you want them to appear under your new categories, there's a shortcut so you don't have to re‑file each product by hand. It lives on the Lifestyle Settings page → Bulk Actions / Import tab → Item Group section.
flowchart LR
    A["Products filed under<br/>Original Item Group"] -->|Sync button| B["Re-filed under<br/>eCommerce Item Group"]
    B --> C["Now show under the<br/>matching category"]
- Open Lifestyle Settings (Ctrl/Cmd + G → Lifestyle Settings) and click the Bulk Actions / Import tab.
- Scroll to the eCommerce Item Group Mapping table and click Add Row.
- In Original Item Group, pick the group your products are filed under today. In eCommerce Item Group, pick the group that matches the category you want them to show under. Add a row for each mapping.
- Click Save.
- Click Sync Item Group Mapping to Existing Items and confirm. The store moves every matching product to the new group in one pass.
How you know it worked: a Sync completed successfully message appears, and the affected products now show under the target category's listing page (Step 6).
Use this only when you need to re‑file products in bulk. For a store you're building fresh, it's simpler to file each product under the right group as you create it (Section 08) — you can skip this table entirely.
What you've accomplished
Your storefront now has a working browse structure: a top menu of categories in your chosen order, drop‑down sub‑menus that follow your product groups, and a filtered listing page behind each one. As you publish products (next section), they'll flow into these categories automatically.
Next: 08 · Add Your First Products to put sellable products into these categories.
One‑time technical setup — ask your administrator
These are not day‑to‑day shop‑owner steps; they're handled once by whoever installs and maintains the store:
- An active theme is required. The top menu and listing pages are drawn by your active storefront theme. A brand‑new site has no theme records until an administrator scaffolds and activates one — see 04 · Choose & Activate Your Theme.
- Product groups (Item Groups) live in ERPNext. Each Ecommerce Category points at an ERPNext Item Group. Creating those groups, arranging them into a parent → child tree, and ticking each one's "Display on Website" box (which is what makes it appear as a drop‑down sub‑menu item) is done in ERPNext core, not on the Ecommerce Category screen. If a sub‑menu item you expect is missing, it usually means the corresponding Item Group isn't marked to display on the website. Ask your administrator, or see the ERPNext Item Group documentation.