SEO & Social Sharing
This section is about how your store looks to the outside world — on Google, on ChatGPT, and when someone pastes a link to one of your products into WhatsApp, Facebook, or X (Twitter).
Two different audiences read your store:
- Search engines and AI assistants (Google, Bing, ChatGPT, Perplexity) read the title and description of every page to decide how to list it and what to say about it.
- Social networks show a share card — a title, a description, and a picture — whenever your link is posted.
The good news: your store already produces all of this automatically. This section shows you how to set sensible store-wide defaults, how to fine-tune individual pages when you want to, and how the automatic share images work — all without touching any code.
Before you start (prerequisites)
Complete these first:
- 03 · Your eCommerce Settings Hub (Lifestyle Settings) — all the store-wide SEO settings live on this page. You should already know how to open it and click Save. In particular, your Store Name should be set (on the Details tab), because it appears in every page title.
- 04 · Choose & Activate Your Storefront Theme — a theme must be active so the storefront actually renders the titles and share tags you set here.
For the per-page fine-tuning later in this section, it also helps to have done:
- 07 · Organize Your Catalog (Categories) — so you have categories to tune.
- 08 · Add Your First Products — so you have products to tune.
You are logged in to the admin (Desk). Open Lifestyle Settings from the Desk search bar (press Ctrl/Cmd + G, type Lifestyle Settings, and press Enter).
How SEO layers together
Your store fills in a page's title, description, and share image using a simple top-down rule: it starts from your store-wide defaults, and lets each individual page override them when you've set something more specific. You only ever have to fill in the levels you care about — everything else falls back to a sensible default.
flowchart TD
A[Store-wide defaults<br/>Lifestyle Settings · SEO tab] --> B{Does this specific page<br/>have its own SEO values?}
B -- No --> C[Use the store-wide default]
B -- Yes --> D[Use the page's own<br/>title / description / image]
C --> E[Final title, description & share image<br/>shown on Google & social]
D --> E
Because of this, the fastest path is: set good store-wide defaults once (Part A), then only override the handful of pages that deserve special wording (Part B).
Part A · Store-wide SEO defaults
Everything store-wide lives on one tab.
Step 1 · Open the SEO tab
- Open Lifestyle Settings.
- Click the SEO tab along the top.
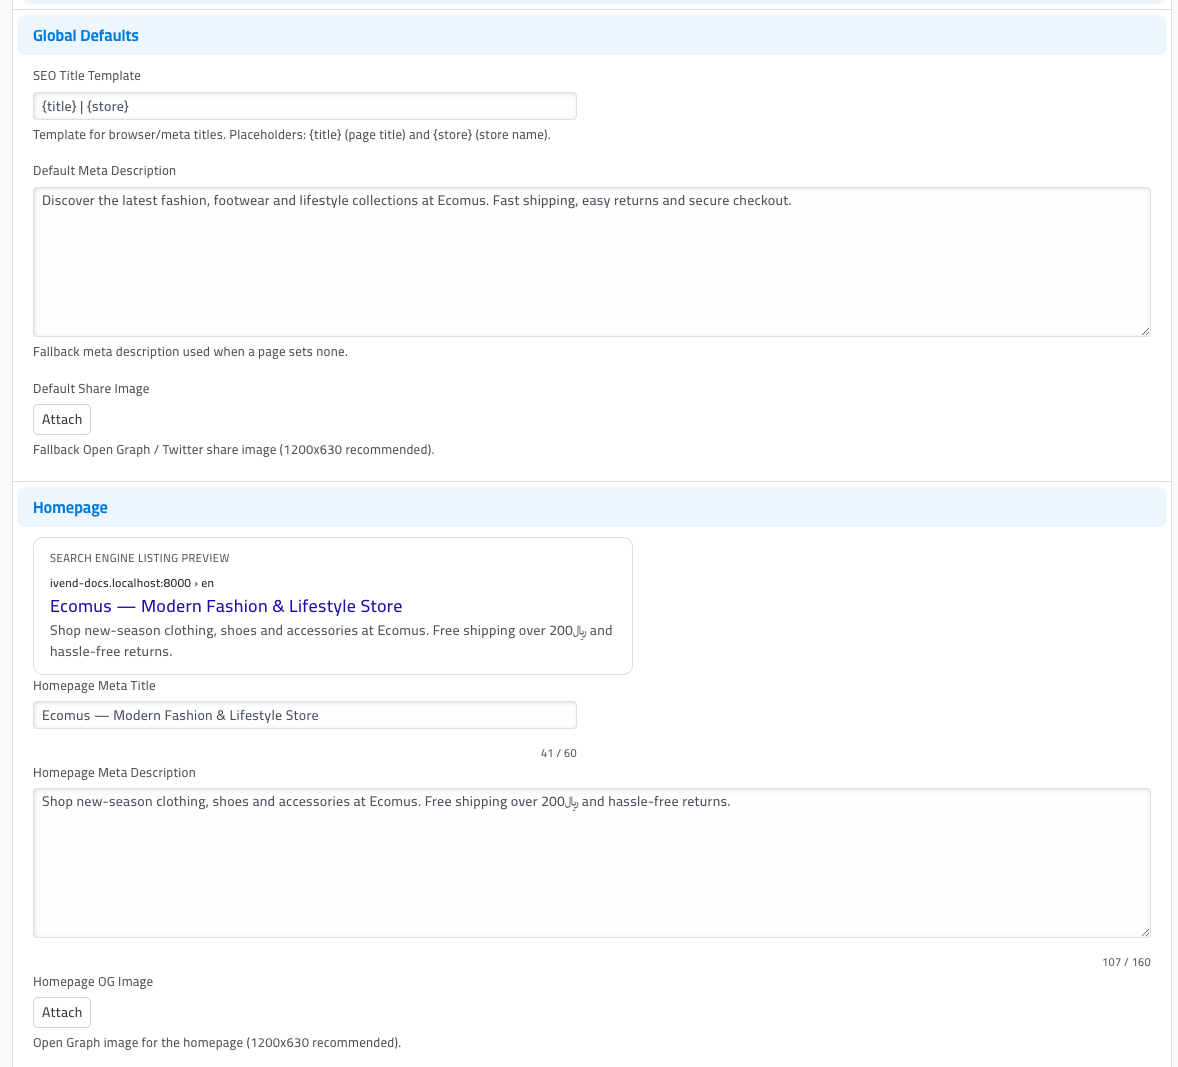
You'll see the tab is divided into labelled sections: Global Defaults, Homepage, Product Listing, Social, Static Pages, and Crawlers & AI.
Step 2 · Set your global defaults
These are the fallbacks used for any page that hasn't been given its own wording.
- In Global Defaults, set the SEO Title Template. This controls how browser-tab and Google titles are built. The default
{title} | {store}means a product page becomes "Slim Fit Sweater | Ecomus" — the page's own title, a pipe, then your store name. Leave it as-is unless you have a reason to change it. ({title}= the page's title,{store}= your Store Name.) - Fill in the Default Meta Description — one or two plain sentences describing your whole store. This is used whenever a page has no description of its own.
- Optionally attach a Default Share Image — the picture shown when a link with no image of its own is shared on social media. The recommended size is 1200 × 630 pixels.
Step 3 · Tune your key pages (with the live preview)
Below Global Defaults you can give specific wording to your most important pages: the Homepage, the Product Listing page, and the two store-info pages (Find Store, Contact Us).
Each of these has a Search Engine Listing Preview — a live mock-up of exactly how the page will look in Google search results. As you type, the preview and the character counters update instantly.
- In Homepage, type a Homepage Meta Title and Homepage Meta Description. Watch the preview card redraw as you type.
- Keep an eye on the counters. Aim for a title under 60 characters and a description under 160 characters — beyond those, Google cuts the text off with an ellipsis. A counter such as
41 / 60means you've used 41 of the recommended 60 characters. - Do the same for the Product Listing section (this is your all-products "shop" page).
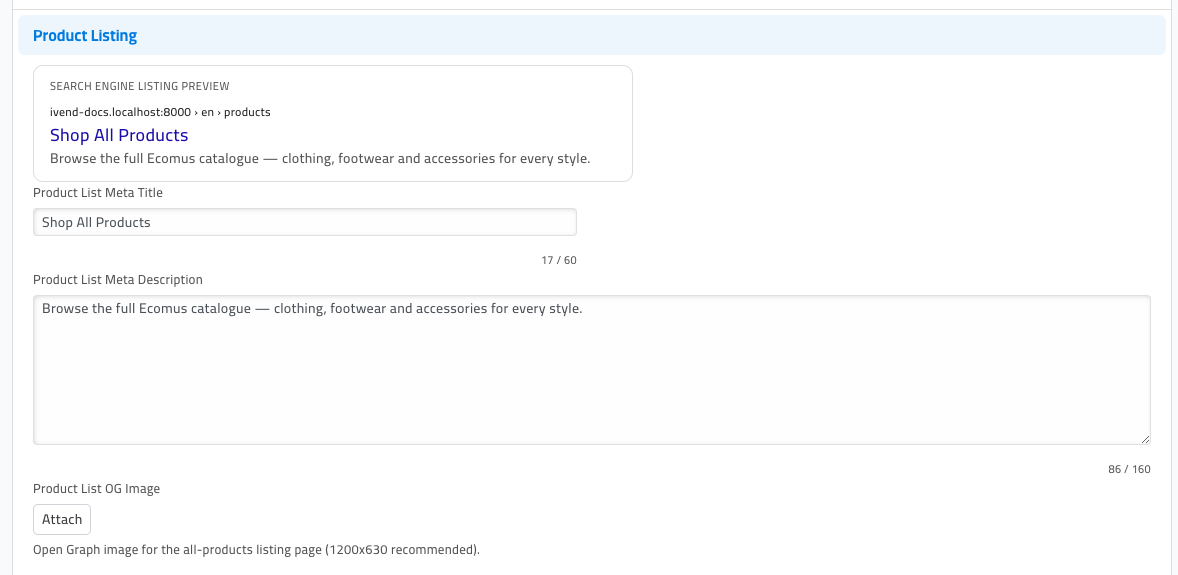
How you know it worked: the blue title and grey description in the preview card match what you typed, and the little URL line at the top of the card (for example ivend-docs.localhost:8000 › en › products) shows the real page address.
Step 4 · Add your social handle
- In the Social section, set the Twitter Handle — your store's X/Twitter username, including the leading
@(for example@ecomus). This is credited on share cards when your links are posted on X.
Step 5 · Save
Click Save (top right, or Ctrl/Cmd + S). The previews you saw are exactly what visitors, Google, and social networks will now receive.
What if I leave a field blank? Nothing breaks. A blank Homepage title simply falls back to your Store Name via the title template; a blank description falls back to your Default Meta Description. Fill in what matters and leave the rest.
Part B · Fine-tune individual pages
Sometimes a specific category or product deserves its own wording — richer keywords, a hand-written description, or a special share image. Every category, product, and CMS page has its own SEO section that overrides the store-wide defaults, and it comes with the same live preview.
Step 6 · Give a category its own listing
- Open a category: press Ctrl/Cmd + G, type Ecommerce Category, open the list, and click a category (for example Women). (Setting up categories themselves is covered in 07 · Organize Your Catalog.)
- Scroll to the Search Engine Listing section near the bottom and click its heading to expand it.
- Fill in:
- Meta Title — how this category should appear in search (for example Women's Fashion & Clothing).
- Meta Description — a sentence or two selling that category.
- OG Image (optional) — a custom share picture, if you don't want the automatic one.
- No Index — tick this only if you want to hide the page from Google (rare; leave unticked normally).
- Click Save.
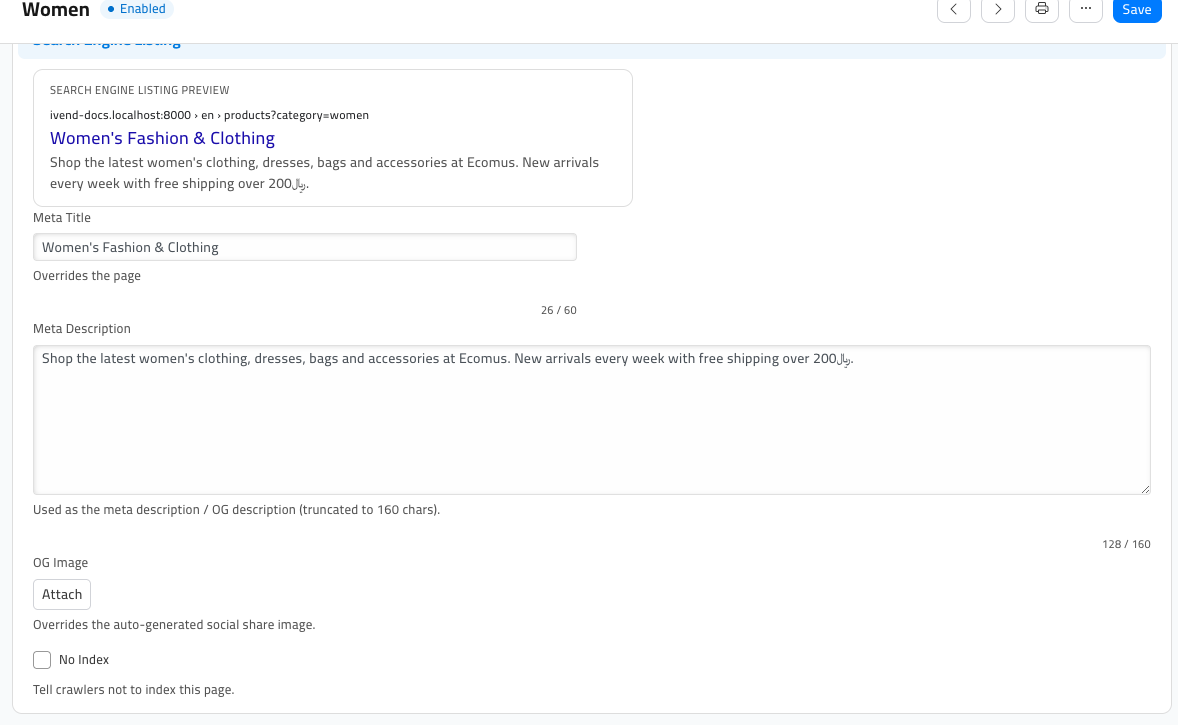
How you know it worked: the preview card updates as you type, and after saving, the storefront category page uses your wording instead of the store-wide default.
Products work exactly the same way. Open a product's Style Attribute Variant record (its storefront listing) and you'll find the same Search Engine Listing section — with two extras: a Meta Keywords field and an advanced JSON-LD (Structured Data) box that most owners never need to touch. CMS content pages (Shop Web Page) have the same section too. In all cases: fill in a title and description, save, done.
Part C · Social share images (Open Graph)
When someone shares a product link, your store generates a share card automatically — you don't have to design anything.
The automatic share card
For every product, the store renders a 1200 × 630 image on the fly, containing your brand name, the product's name, its category, and its price. Facebook, WhatsApp, LinkedIn, and X use this image when your link is posted. Here is a real one, generated live for a product:
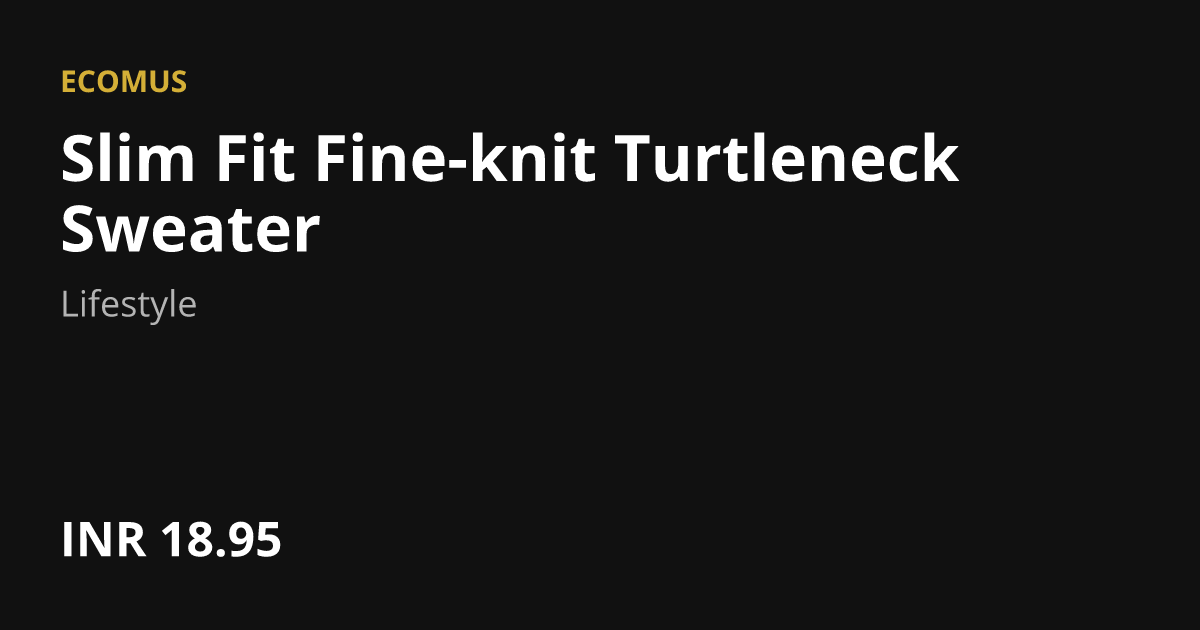
You can preview any product's card yourself by opening /og-image/<product-route>.png on your store — for example /og-image/slim-fit-fine-knit-turtleneck-sweater.png.
Which image wins?
The store looks for a share image in this order, using the first one it finds:
flowchart LR
    A[Page's own OG Image<br/>set in Part B] -->|not set| B[Default Share Image<br/>Lifestyle Settings]
    B -->|not set| C[Store favicon]
    C -->|not set| D[Built-in default image]
    A -.->|set| WIN[This image is used]
    B -.->|set| WIN
    C -.->|set| WIN
    D --> WIN
So: to control the picture for one page, set its OG Image (Part B). To control the picture for everything at once, set the Default Share Image (Part A, Step 2).
Customising the automatic card design (advanced, optional)
The layout of the auto-generated card (fonts, colours, what fields appear) is controlled by an OG Image Template. On a brand-new store there are none — the store falls back to a clean built-in design, which is why the card above already looks good. You only create a template if you want a different look.
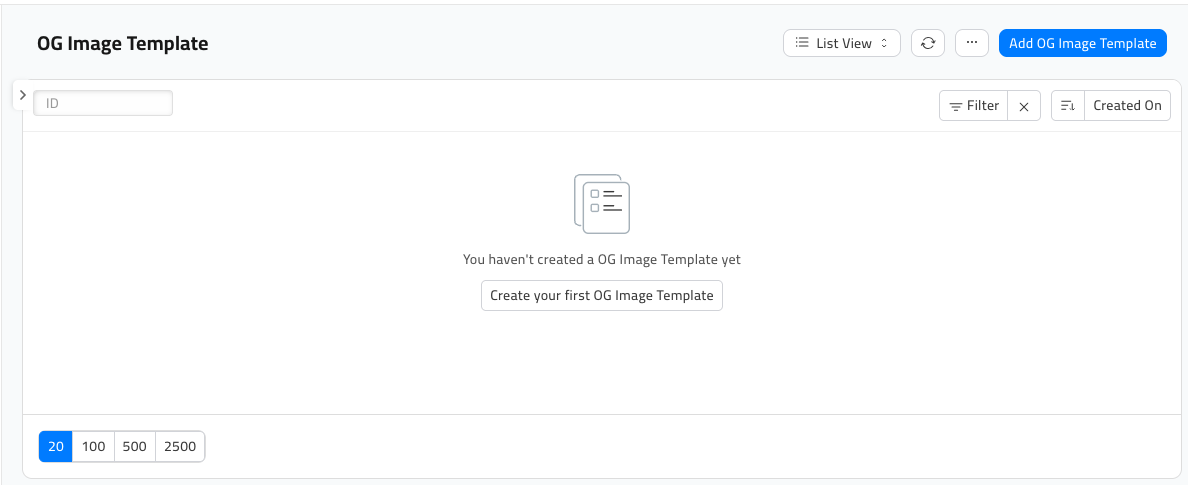
If you do want a custom design, open OG Image Template (Ctrl/Cmd + G → OG Image Template), click Add, choose the For DocType the template applies to (for example Style Attribute Variant for products), tick Enabled, and write the card layout in the Template HTML box. The current record's data is available as doc (so {{ doc.display_name }} prints the product name).
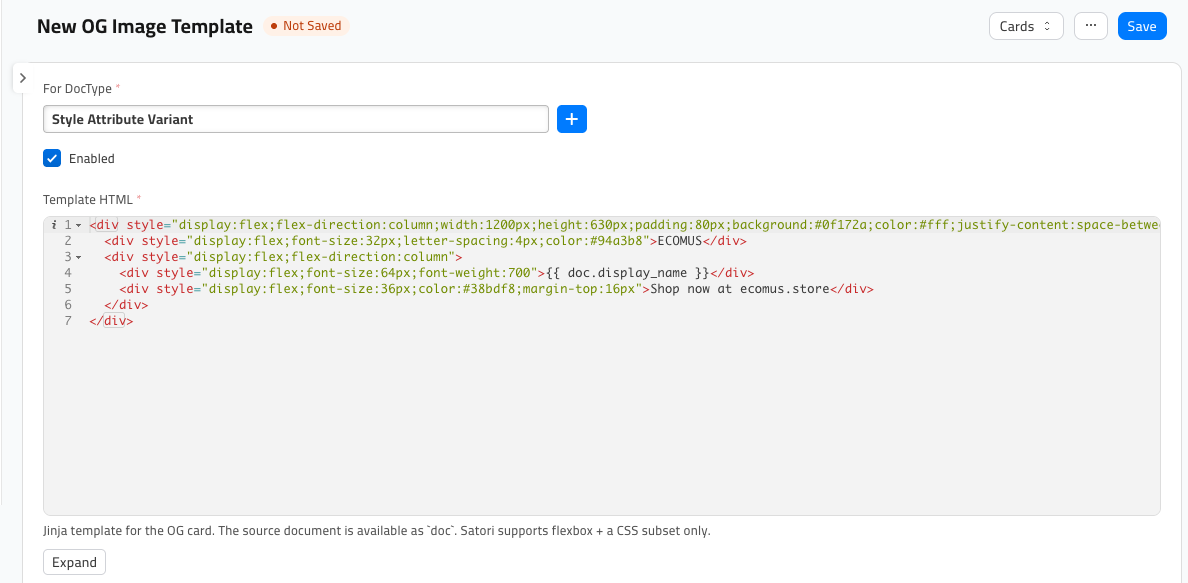
Designing an OG template is a developer task — it uses HTML and a limited set of CSS. If you want a branded card design, hand this to your administrator or designer rather than editing it live. The built-in default is perfectly fine to launch with.
Part D · Search-engine plumbing (mostly automatic)
Three technical files tell search engines and AI assistants how to crawl your store. All three are created and kept up to date for you automatically when the store is installed — you rarely need to touch them.
robots.txt— tells crawlers which areas to skip (your cart, checkout, and account pages are hidden; product and category pages are allowed). Served at/robots.txt.sitemap.xml— an auto-generated, always-current list of every public page, so search engines can find them all. Served at/sitemap.xml.llms.txt— a plain-language brief for AI assistants (ChatGPT, Perplexity) describing what your store sells and where the data lives. Served at/llms.txt.
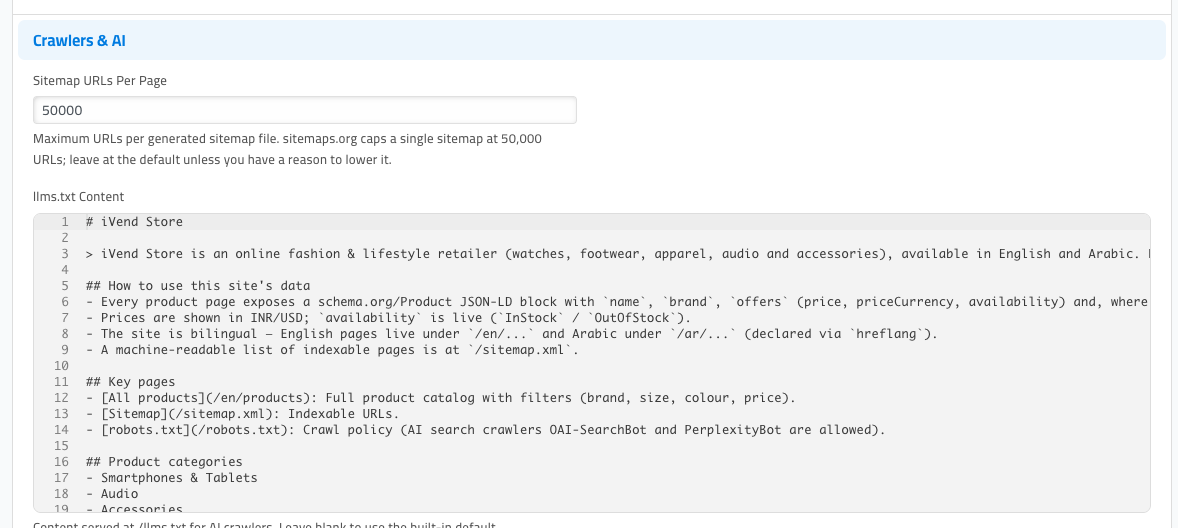
You can edit the AI brief and the sitemap size from the Crawlers & AI section of the SEO tab:
- Sitemap URLs Per Page — how many pages go in each sitemap file. Leave it at the default (
50000) unless your administrator advises otherwise. - llms.txt Content — the text served at
/llms.txt. A helpful default is pre-filled; edit it to describe your own store, or leave it blank to use the built-in default.
How you know it worked: open http://<your-store>/robots.txt, /sitemap.xml, and /llms.txt in your browser — each should return text (not an error). Click Save after editing the llms.txt content, then reload /llms.txt to confirm your changes show.
One-time technical setup — ask your administrator
These are handled automatically on install, but are worth knowing about:
robots.txt,sitemap.xmlandllms.txtare seeded automatically when the app is installed or updated. The store only managesrobots.txtwhile its marker comment (# Managed by ivendnext_ecommerce) is present — if your administrator has hand-edited that file and removed the marker, the store leaves it alone. If any of the three files return an error in the browser, ask your administrator to run the app's install/migrate step.- Custom OG Image Templates (Part C) use HTML/CSS and are a developer task. The built-in default needs no setup.
Quick checklist
Before you move on, confirm on the SEO tab of Lifestyle Settings:
- SEO Title Template is set (the default
{title} | {store}is fine) and your Store Name is filled in on the Details tab. - A Default Meta Description is written.
- The Homepage and Product Listing previews read the way you want them to in Google.
- Your Twitter Handle is set (if you have one).
- A test product's share card looks right at
/og-image/<product-route>.png. -
/robots.txt,/sitemap.xml, and/llms.txtall open without an error.
With search and social sorted, your store puts its best foot forward everywhere it's linked. Next, see the buyer's side of things in 15 · The Customer Account Experience, and when you're ready to open the doors, run the final checks in 17 · Preview & Go Live.