Customer Returns
Customer Returns closes the loop after delivery: the customer requests a return from their orders page, the admin approves it and buys a return shipping label with one click (the AfterShip Connector does the buying), and the customer automatically receives the label and tracking link by email — then watches the return's progress from their account, from Requested all the way to Received.
The refund is part of the approval itself: when the whole order is being returned, approving the return issues the credit note and refund immediately — the store doesn't wait for the parcel to come back.
graph TD
    Req[Customer requests a return<br/>from their orders page] --> DN[Return note created<br/>Requested]
    DN --> App[Admin approves —<br/>submits the return note]
    App --> Money[Full return: credit note<br/>and refund issued now]
    App --> Ship[Admin clicks Create → AfterShip<br/>and submits the Shipment]
    Ship --> Lbl[Return label bought<br/>Label Ready]
    Lbl --> Mail[Customer emailed the<br/>label + tracking link]
    Lbl --> Trans[Carrier scans the parcel<br/>In Transit]
    Trans --> Recv[Parcel back at the store<br/>Received]
What the customer sees
Each return on an order shows a simple status ladder in the customer's account, plus the label and tracking links once they exist:
| Status | What it means |
|---|---|
| Requested | The return request is in — the store hasn't reviewed it yet. |
| Approved | The store approved the return. No shipping label yet. |
| Label Ready | The return label is bought — the label and tracking links appear here, and the same links were emailed to the customer. |
| In Transit | The carrier has scanned the parcel and it's on its way back (out-for-delivery and pickup-point states show as In Transit too). |
| Received | The carrier delivered the parcel back to the store. |
"Refunded" is shown separately from the shipping ladder — it's an independent indicator, not a step. On this setup the credit note is issued at approval time for a full return, so a customer can (correctly) see Refunded while the parcel is still In Transit. The money and the parcel travel on their own timelines.
Setting it up
Returns need two things configured: the return policy in Lifestyle Settings, and a working AfterShip Connector for the labels.
1. Return policy — Lifestyle Settings
Type Lifestyle Settings in the search bar at the top of the desk and open it, then find the return settings (the shop-owner guide walks the same screen with screenshots in Orders, Fulfillment & Returns — Step 5 · Set up returns):
- Allow Return — tick this to enable returns. With it off, customers cannot request returns at all.
- Return Period (Days) After Invoice Generated — the return window, counted from the order's invoice date. Requests after the window are refused.
- Return Policy Type — Global uses the one period above for everything; Per Item reads each item's own return-days value and falls back to the global period for items that don't set one.
- Reason for Return — the table of reasons customers pick from when requesting a return.
Click Save (top right) when done.
2. Labels — AfterShip Connector
Return labels are bought through the store's AfterShip account. The AfterShip Connector setup must be complete first — API key, default carrier, default service, default parcel template. Return shipments start from those defaults — see Which carrier, and who pays below.
Handling a return, step by step
-
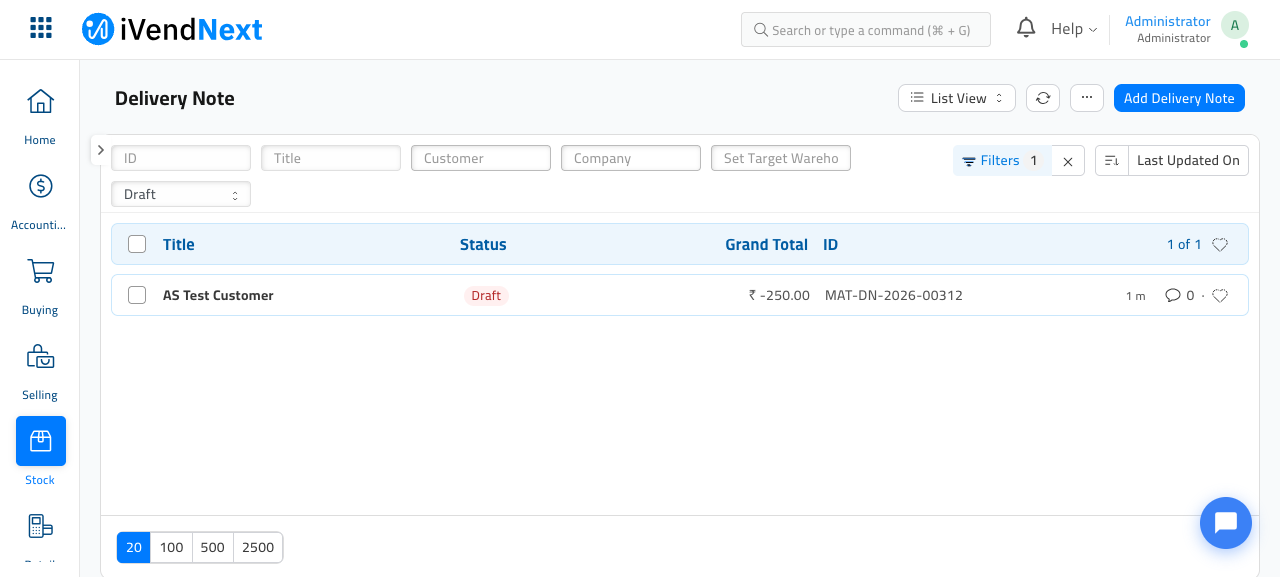
A request arrives. When a customer requests a return, a draft return Delivery Note is created automatically — the items carry the customer's chosen reason and any comment. Find it in the desk: type Delivery Note in the search bar, open the list, and filter by Is Return with draft status. The customer sees Requested.
-
Approve it. Open the draft return note, review the items and reasons, and click Submit (top right). Submitting is the approval — and if the whole order is being returned, the credit note and refund are issued right now. The customer sees Approved.
-
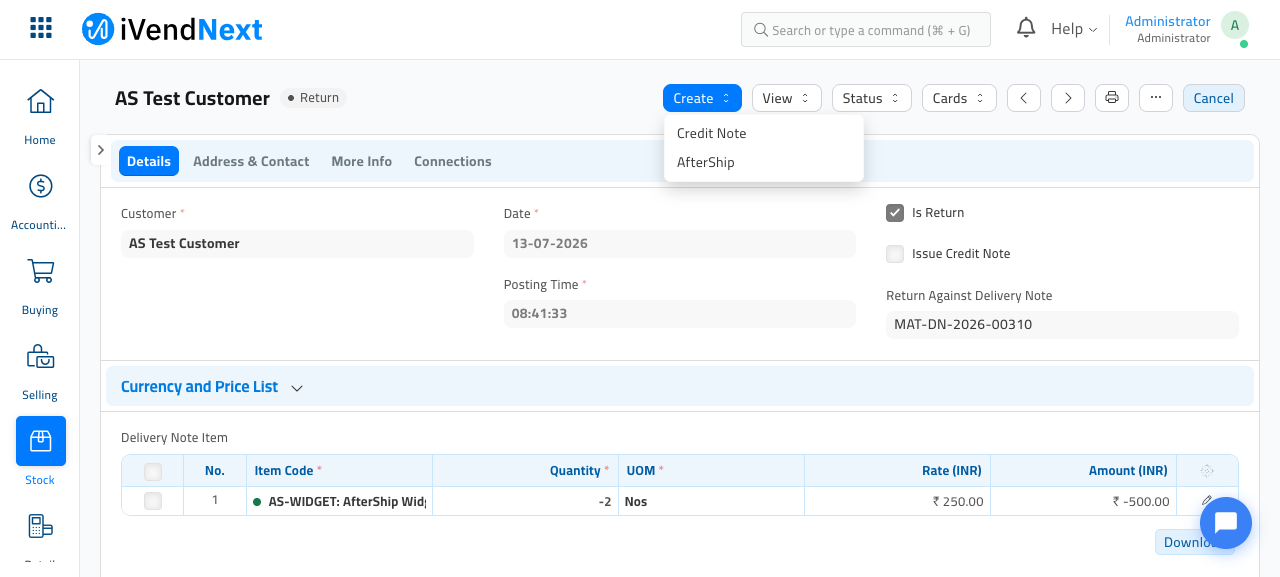
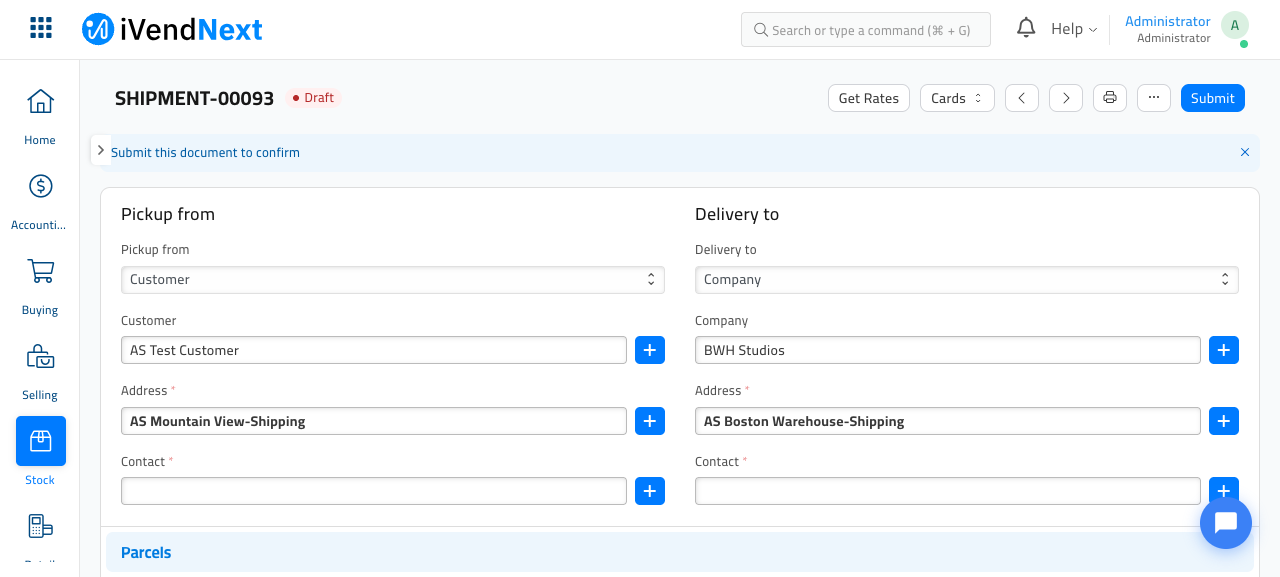
Buy the label. On the submitted return note, open the Create menu (top right) and click AfterShip. A draft Shipment opens with the addresses already swapped — the customer is the sender, the store is the receiver. Review it and click Submit.
-
Done — the rest is automatic. Submitting the shipment buys the return label, and the customer is emailed the label and tracking link in the same moment. Their account flips to Label Ready, then follows the carrier scans to In Transit and Received.
Which carrier, and who pays
- The return shipment starts from the store's default carrier and service in AfterShip Settings — deliberately never the shipping option the customer paid for at checkout. A customer who paid for Express outbound still returns the parcel on the store's own return arrangements (see Customer Delivery Options — Fulfillment, which pins the paid choice to the forward leg only).
- The default isn't always what gets bought. If Auto Select Cheapest Rate is on in AfterShip Settings, the return label is bought at the cheapest live quote across your carriers — a natural fit for returns, where speed rarely matters and cheapest wins (see auto-cheapest on the connector page). The admin can also Get Rates on the draft return Shipment and pick a specific rate — a picked rate is what gets bought.
- The store pays for the return label — it's bought on the store's own carrier account when the shipment is submitted, and the label cost is recorded on the shipment record.
- About the email: the label email is sent for any return shipment that has a reachable customer email — the order's contact email, or failing that the email on the shipment's sender address. That includes returns a staff member creates entirely from the desk, so expect the customer to be notified whenever a return label is bought against their order. One scope note for those desk-driven cases: if the order didn't come through the storefront, the automatic refund-at-approval does not fire — the money side of such a return is handled manually. If the email can't be sent, the label purchase still goes through — check the Email Queue (search bar) if a customer reports a missing label email.
Technical notes
- Endpoint:
ivendnext_ecommerce.api.return.get_return_status(sales_order_id)— whitelisted, owner-scoped (callers only ever see their own orders; anyone else gets a permission error). Returns one entry per return Delivery Note against the order:{"return_id", "status", "refunded", "requested_on", "items": [{"item_code", "qty", "reason"}], "label_url", "tracking_url", "awb_number"}. Status is derived, no new fields: draft return DN → Requested; submitted DN with no submitted return Shipment → Approved; a linked return Shipment with a label/AWB → Label Ready; the Shipment's webhook-updatedcustom_tagmaps InTransit / OutForDelivery / AvailableForPickup → In Transit and Delivered → Received. If a label is re-bought, the newest shipment wins. refundedis a separate boolean: true when a submitted credit note exists against the order's invoices (and the return note is submitted) — issued by the full-return approval hook, hence refund-before-receipt.- Label email hook:
ivendnext_ecommerce.api.return.send_return_label_emailruns on Shipmenton_submit(registered in the ecommerce app's hooks), guarded bycustom_is_return. Recipient = the Sales Order'scontact_email, falling back to the pickup-address email (return legs swap the parties, so the shopper sits on the pickup side). Any mail failure is logged and never blocks the submit. - Request side:
return_items(sales_order_id, items)validatesallow_returnand the return window (global, or per-itemreturn_dayswith global fallback) against the invoice date, then creates the draft return note with per-item reasons. - Verified end-to-end:
aftership_connector/test_return_portal_flow.py— the full journey, owner scoping, the email fallback, and email-failure-never-blocks, with only the mail boundary mocked. - Deferred (not built yet, by decision): auto-creating the return Shipment at approval time; a return-fee-deducted-from-refund policy; pay-on-scan carrier return products.